Rast Dresser Hack No. 2

When it comes to dressers I think its safe to say we’ve found our favorite one. This little gem has made it possible for us to not only create dressers we love once but now twice!

IMG_7886

For those of you that have been following along for awhile now you may remember our first Rast Dresser Ikea Hack that we did for our master bedroom. Lately we have been working on our daughters shared room and when it came to needing a new dresser we were limited to a size that would fit between their beds. So between the size and not wanting to spend hundreds of dollars on a dresser we didn’t know the quality of, we decided to try another hack!!  And I’m so glad we did.

What you’ll need:

  1. Ikea Rast dressers $35 each (2 for this exact project)
  2. Wood Glue $5
  3. 2″ wide hobby boards from Home Depot $2 each
  4. Wood Screws
  5. Tools such as a tape measure, saw, drill, hammer or nail gun…
  6. Large piece of wood for top

IMG_6912

The first step to this project is to assemble your rast dressers minus the drawers. You don’t want to put the drawers together until you’ve added the trim pieces to the drawer fronts.

IMG_6911

Once you’ve built both dressers you will attach each dresser to create one piece. To do this you simply line them up making sure the top and the front of the dressers are flush. Use your drill, wood glue and some wood screws to secure them into place.

IMG_6913

IMG_6915

IMG_6917

IMG_6916

Next you will add the trim pieces to each drawer front. I would recommend measuring each of your drawer fronts just to be sure you get exact measurements but for ours we cut the top two pieces at 23″ and the two side pieces at 4.5″. After cutting and lightly sanding all of the trim pieces you will use wood glue and your nail gun to attach them to each drawer.

IMG_6951

IMG_6946

IMG_6947

The next step is adding a top. To create the top piece we had to cut down a larger board. Lowes and Home Depot sell pre-made boards it various widths. For this project you’ll need one that is about 13″ wide by 5′ long. Again, be sure to measure the top of your two dressers, but for ours we cut our top at 23″ wide and 4.5″ long. This allows for an inch over hang on both sides and the front of the dresser.

IMG_6952

Be sure to use wood glue and with your drill and wood screws, attach securely.

IMG_6956

IMG_6957

Lastly, you will assemble the drawers and add them to the dresser. That’s it! Paint and hardware, you’ve got a beautiful dresser for around $100!

IMG_6959

IMG_6960

I absolutely love the way this little dresser turned out! Not only were we able to create the perfect piece on a budget but we also create a piece that fit into the room perfectly. We were having a hard time finding a dresser that would fit just right between the two beds and this piece couldn’t have fit any better. As far as the hardware, I’m sure you know, there are endless option for hardware that you can add to the dresser to fit your style. For me, I wanted to keep it simple and let the piece speak for itself. So I simply painted the wooden knobs that came with the dressers the same color as the dresser. Also another easy way to save a little on this project!

IMG_7892

IMG_7893

IMG_7891

I hope you’ve all enjoyed our second Ikea Rast Dresser hack today and as always, if you have any questions please leave them in the comments below or email me at misdiy@outlook.com. I’ve attached a photo below that you can pin if you’d like to keep this blog post for future rast dresser hacks. 😉

IMG_2995

~Happy Reading Friends


12 Ways to Add Spring to Your Home

Spring is my second favorite season (most of you know fall is my number one favorite). I love how everything seems to come alive again in Spring, fresh and new.

IMG_2902

Today on the blog I wanted to share a few super easy ways you can add spring to your home! Each of the things I’ll share today are easy and inexpensive, which is my favorite combo next to simple and cozy! 😉

  1. Spring Clean

If you missed my blog post about How I Spring Clean feel free to hop over and don’t forget your Spring cleaning printable!! Spring cleaning always seems to make our home come alive. Its the wake up after winter, we refresh, clean and purge.

IMG_7883

2. Fresh cut flowers

I try to leave a few extra dollars in the grocery budget for some fresh cut blooms.  My favorite place to find them is at Trader Joes. They always  have so many to choose from and they’re super inexpensive! There’s just something about having fresh, beautiful greens or flowers in the home. And the great thing is, now that its spring you can even find and cut some yourself making this spring addition completely free!!

IMG_2819

3. Open the windows

This one is probably the simplest thing you can do but opening the windows and allowing the cool spring air to fill your home… well its my favorite thing to do this time of year!! The smells and sounds, nothing says spring more than a cool breeze and the sound of singing birds.

IMG_7717

4. Switch up linens

If you still have that super chunky knit throw out from winter, its time to swap it out with something a little more light weight. This is also the perfect time to do a little refresh just by changing or switching out your linens.

IMG_7751

5. Add greens

Another easy way to bring your home to life with spring is to add some greens. Not only will this help bring the outdoors in and make your home feel spring ready, it’s also very good for the air quality in your home. So by adding greens you can breath healthier air AND have pretty plants to look at. That’s a total win in my opinion!

IMG_2817

6. A Spring scented candle

Next to the open windows this may be my favorite. I love a good smelling home, as long as its not too overwhelming. I’ve found a candle company that I absolutely love, Antique Candle Works. You can find them here Antique Candle Works. Their candles are so yummy! Perfect for any and all seasons or even just as a gift.

20180322_102130193_iOS

7. Add a pop of color

Okay I know I know, I’m a neutrals girl but you guys… adding a subtle pop of color to your décor can freshen up the space and make it feel more like spring, especially if you choose an earthy or subtle pastel color! Whether its with a throw, pillow covers or some art, having a light pop of color adds some fun and welcomes spring.

IMG_7650

8. Music

I will forever say music! We listen to music daily but there’s something about having it on in your home with the windows open and that spring scented candle burning! Not only does it make our home feel alive but it also makes my soul feel alive. Bump it up a notch by dancing barefoot in a room with wood or tile flooring. Sounds silly I know but letting your feet be free of the wool socks and boots we’ve worn all winter, to feel the coolness, its like standing in the cool grass barefoot.

IMG_7854

9. Plant an indoor herb garden

To create my little herb area in the kitchen I used an Ikea rack that I’ve had for some time now, added a few of their small buckets, some basil and thyme I picked up at Trader Joes and that was it! I had a simple, easy to create spot to grow some herbs. I absolutely love the way it turned out and I’m so excited we now have fresh herbs in the kitchen!!

IMG_2800

10. Refresh Your Space

With each season I enjoy refreshing different areas in our home. It’s never anything major just little things here and there that can easily make the room take on a different feel. It can be as simple as shopping your home, switching a few signs, photos/art work and linens. Or if you’ve set aside a budget for new home décor, now is the perfect time to add in those new pieces, or check off a few DIY projects.

IMG_7857

11. Add a Spring Wreath

This is a fun way to add a touch of spring and you can even make this a little DIY project! I’ve seen so many bloggers and Instagram friends share their DIY spring wreaths!! In our home I simply moved this magnolia wreath I’ve had for a couple years now, from our master bedroom to the front door, giving it a whole new, spring ready look!

IMG_2912

12. Try a new Spring Inspired Recipe

A new tradition that I’m just starting, trying a new ‘seasonal inspired’ recipe. Anything from drinks, dinners or jams to desserts I want to try a new recipe with each season that includes foods that are only available during that season. Strawberry season is almost here in our area and I’m thinking this year I want to try making strawberry jam! Last year I made a fresh strawberry pie and it was delicious!

IMG_2919

That’s it my friends. I hope you’ve enjoyed today’s blog post and the 12 things I’ve suggested to add Spring to your home. Of course the list doesn’t have to end here, you can find things specific to your home and style that say spring to you! My little list was just created from some of the things I do in our home in hopes that it would inspire you to bring in spring for your own home! As always if you have any questions please leave them in the comments below or feel free to email me at misdiy@outlook.com. You can also follow me on Instagram and Pinterest @misdiy. I’ve attached an pin-able image below if you’d like to save this post for later.

~Happy Reading Friends

IMG_7856


How I Spring Clean

Spring is finally here and the spring cleaning has begun! I have to say this is one of my favorite times of the year because the house gets a good scrub and everything seems to come alive again!

20180322_102130193_iOS

Today I wanted to share ‘How I Spring Clean’ our home, I’ve received many requests for this post! Y’all don’t understand how excited I am that you too, get excited about spring cleaning! Its so rewarding!! Below I’ve included a printable that you may use for each room in your home while you spring clean and I’ll break it down a little as we go.

Spring Cleaning 1 (Print here)

Living Room:

  • Windows
  • Ceiling Fans/light fixtures
  • Baseboards + Walls – wash/touch-up
  • Linens
  • Clean under furniture
  • Purge items

 Kitchen + Dining:

  • Appliances
  • Purge Items
  • Cabinets- Inside + Out
  • Baseboards + Walls- wash/touch-up
  • Fridge + Freezer
  • Light fixtures
  • Linens
  • Windows
  • Shelves + Other storage

 Bathrooms:

  • Baseboards + Walls- wash/touch-up
  • Shelving + Storage
  • Purge
  • Linens
  • Windows
  • Light fixtures

Bedrooms:

  • Baseboards + Walls- Wash/touch-up
  • Linens
  • Purge
  • Clean under furniture
  • Closets
  • Windows
  • Light Fixtures

Bonus Areas:

  • Baseboards + Walls- wash/touch-up
  • Windows
  • Linens
  • Clean under furniture
  • Purge
  • Light Fixtures


Spring cleaning for me is a chance to deep clean our home, because you know its not going to happen during summer, and purge any items we no longer use or need. I like to take about a week (sometimes two) to work through each room and my checklist. For each room I clean all baseboards and walls, I also take time to touch up these areas with paint where its needed. All of the linens are washed from blankets to slipcovers and window treatments. You can see the rest of my spring cleaning for this room on my Spring Cleaning list above.

IMG_7724


I also like to refresh a couple of areas in our home while I’m cleaning. When things are striped down it makes it easier to switch things up creating a new look and feel in the space. This can be as simple as switching up art work or linens. In our family room I simply switched around a few pieces and added some greens. Super simple!

IMG_2820

IMG_2800

IMG_7718

IMG_7717

As far as my tasks for each room, they’re rather similar. I clean all of the baseboards and walls, windows, light fixtures, linens and of course purge. Windows are one of the first things I work on because I love opening them and allowing the spring air to fill our home while I clean!

IMG_2819

IMG_2817

IMG_7652

To clean our windows I use a homemade window cleaner you can find here in my How ‘I’ Keep a Tidy Home post, along with all of my other homemade cleaners. I also use vinegar for the window sill.  You can see in the photos below the before and after. We have so many trees around our home that our windows always get dirty. I clean them with each change of the seasons to help keep it manageable. To do this, I vacuum out the dry dust, dirt and bugs, spray the sill with the vinegar and allow it to sit for a few minutes before wiping it clean.

IMG_7577

IMG_7582

During my week of spring cleaning I also check off my cleaning schedule, which you can also find in my How ‘I’ Keep a Tidy Home post. It just makes sense to do all of the cleaning for each room while I’m already in there working on it. One thing I do save for last is the dusting of furniture and floors. I like to clean all of the dust and dirt starting at the top and work my way to the bottom.

IMG_2818

IMG_2824

Fresh flowers and greens… This doesn’t fall under the cleaning category (well plants do clean the air so theres that) but in my opinion bringing the outdoors in makes your home feel more alive and ready for spring! Plus who doesn’t love seeing a clean kitchen or dining room table with some fresh cut flowers?!

IMG_7703

In our dining room I also wipe down the table and chairs along with the shelves and goodies on them. I don’t know about you but our dining set is always covered in some type of food, a little red sauce here, some smashed oats there… its a good time to give these pieces a good scrub and make them feel new again. Also, if your table and chairs, or shelves are painted, they also fall under paint touch-ups!

20180315_024031570_iOS

In our bedroom, again, I wash all linens, the walls, and windows. I also like to clean out our night stands and of course the closest. Now is the time for our wardrobe to start switching out to spring/summer items but its still cool enough that we can take the time to transition and purge the clothing items we no longer wear. One way I do this is by using the backwards hanger trick. I turn all of my hangers backwards on the rack and put them back the right way as I wear them over the course of a couple weeks. This shows me which items I never wear and makes purging easy! I also carry these tasks over into the girls bedrooms.

IMG_2825

IMG_2821

Another little trick I like to use is marking nail holes and spots that need touched up with paint. While I’m cleaning the baseboards and walls I use painters tape to mark areas that need painted. Once I’ve marked each room this makes it easy to grab the paint brush and quickly touch up each space at once. Bonus to using the same paint color in multiple rooms is that it makes this task quick and easy!

IMG_7772

After I’ve washed all of the light fixtures, walls, linens, cleaned shelves and cabinets, purged all of our unused items I then dust the furniture and clean the floors. By the weekend, weather permitting, our windows are open, the outdoors is let in and friends it feels SO GOOD! For me a clean, decluttered, life breathing home filled with sunshine and all the things we love, feeds my soul!! And I mean REALLY feeds it, like your favorite comfort food, a warm cup of coffee on a cool morning, warm sunshine on your back or that favorite cozy sweater by the fire. Not only does our house come back to life but so does a part of me, its healing after a long winter.

IMG_7703 1

Pin for keeps

I hope you’ve all enjoyed today’s post and I hope you find it helpful in spring cleaning your home! As always if you have any questions please leave them in the comments below or feel free to email me at misdiy@outlook.com.

~Happy Reading Friends

DIY Framed Shiplap

When it comes to DIY’s I love making unique statement pieces and our framed shiplap is just that. I’ve kept many of you waiting for the last two years but today is finally the day!

IMG_2753

I’m so excited to get to share this DIY with you today, its one of my favorites and a rather popular one with my followers as well. Roughly two years ago I decided to do a large framed shiplap piece, using a vintage frame I had found, to help fill a large wall space in our entry. Its been a favorite ever since.

When I first made the framed shiplap for our home I wasn’t really blogging just yet so of course there were no photos to share showing the process. Just recently while redoing our 4 year olds bedroom did I have a chance to photograph the process and share with you all. I created a framed shiplap piece for her room, although a little different, its the same idea and I think you’ll be able to easily follow along!

IMG_7345

The easiest way to do the framed shiplap is to find a frame you love, preferably one that has a small lip on it like shown in the photo below. It makes the process much easier but if you can’t find a frame you love, I’ll share below how you can create your own frame!! For the framed shiplap in our daughters room I picked up a frame from the local thrift store for $1 and painted it to match her room.

IMG_7347

Once you’ve found your frame you’ll need the wood to create the shiplap. For this specific piece I used small poplar craft boards found at Home Depot for less than $2 each. I wanted to keep this piece light since it would be hanging above her bed! You can choose to use a wider board, these are sold in many sizes, but I chose to use 1.5″ to create more of a skinny shiplap for fun.

IMG_7348

IMG_7349

After you’ve collected your items you’ll want to measure the inside of your frame to know the exact measurement to cut each board. Once the wood was cut and sanded I used paint I already had on hand (bistro white) to paint the boards.

IMG_7350

After all of the pieces have dried, you simply attach your ‘shiplap’ to the frame. We chose to use a nail gun for this step because it applied less pressure to the frame rather than a hammer and it was easier to control the angle of our nails.

IMG_7351

Ya’ll that’s it! Add a hanger to the back if your frame doesn’t already have one and your project is complete! Its seriously that easy!!! Now you can make framed shiplap for ALL the rooms. 🙂

IMG_7466

Now lets talk about making your own frame for your shiplap! You’ll have to bare with me because I literally pulled scrap wood from our pile to put this together so I could show y’all. To make the framed shiplap without using a pre-existing frame you’ll need to decide how large you want your piece to be. Once you have your measurements you’ll cut your boards to size. For this mock up, and for the large framed shiplap in our entryway I used 1×4″ pine boards. This will make the piece a lot heavier so remember that when choosing your size but you’ll need the larger size wood to have something to nail your 1×2’s for the frame to. So for the frame, use 1×2″ boards cut to size. I like to over lap the sides with the top and bottom frame piece (as shown below) but you can piece it together how ever you like. Just be sure to measure for the overlapping. You can also decide if you want your shiplap to be set back on the frame like shown or if you’d rather it be flush with the frame. A little tip for your shiplap boards, sand the edges to round them out a bit and it will help give your shiplap the look of spacing. Once all of the wood was cut and sanded I stained the edges of the boards for the shiplap before painting. To connect the shiplap boards before framing we used our keg jig. You could also use wood glue and a clamp, just be sure to let the glue dry over night. Finishing nails around the frame, a hanger or two on the back and you’re finished!

IMG_7468

IMG_7472

IMG_7525 1 (1) (1)

IMG_7554 1 (1)

IMG_7522 1 (1)

Now for those of you that have been following along for awhile, you may have noticed the recent change I made to our framed shiplap. When we first made it I hung a magnolia wreath on it, then a large round basket and now, my favorite of all, its been turned into a sign! I worked with an amazing husband and wife business called Vintage Metal Co. to create the new look for this piece and I absolutely LOVE it! The words are metal and to attach them I simply used command strips cut to size. Super easy and its completely transformed this space! Side note: if you’re curious about the light which is also a new addition, you can read about it here, DIY Wireless Light.

IMG_7671

I hope you’ve found this blog post helpful and I hope it was worth the wait. 😉 I absolutely love our framed shiplap pieces and I hope you do as well. As always, if you have any questions please leave them in the comments below or feel free to email me at misdiy@outlook.com. You can follow me here on the blog and on Pinterest/Instagram @misDIY!

IMG_2754

~Happy Reading Friends


Little Girls Room Makeover

IMG_7539 1 (1)I receive many requests to see the kids rooms in our home. And while we have two little girl rooms I’ve never really done much with them other than remove wall paper and paint. Until recently that is…

IMG_7558 (1)

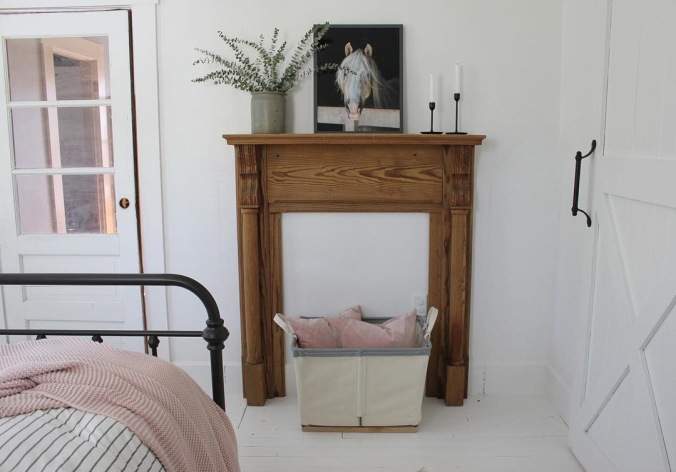
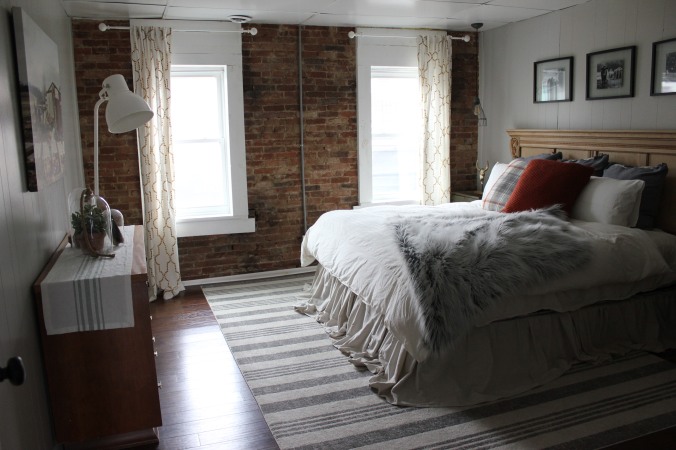
I am so excited to share this sweet little room that belongs to our 4 year old. Of course I have to take you back and show you the before pictures. The very first photo is from the day we received our keys. Shortly after moving in I painted the space, using left over paint from other rooms (lesson learned) and removed the carpet.

IMG_2592 (1)

You are seeing it correctly…lavender ceiling, blue valance and beige walls. Although the wall color wasn’t the worst in our home I didn’t love it.

IMG_6819

IMG_6814

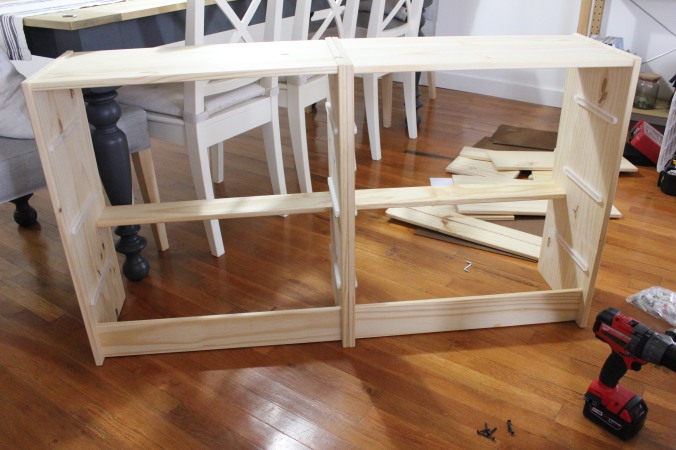
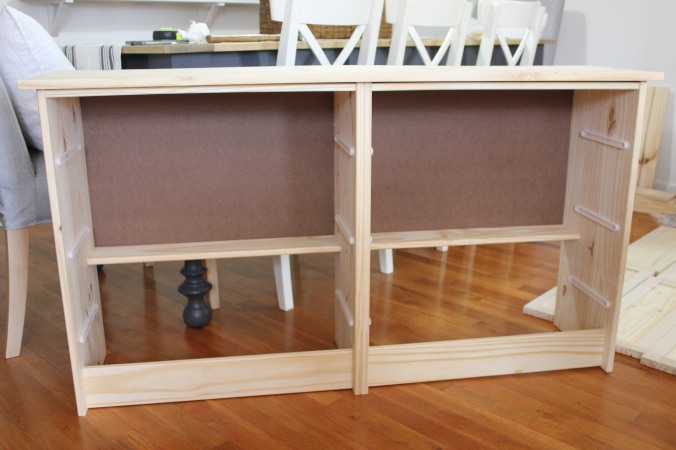
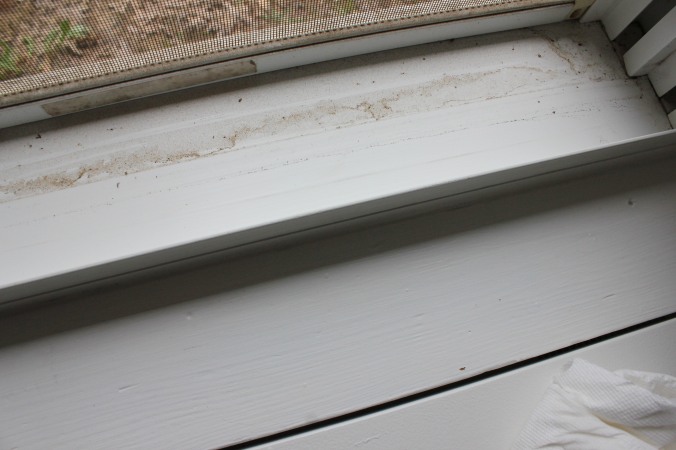
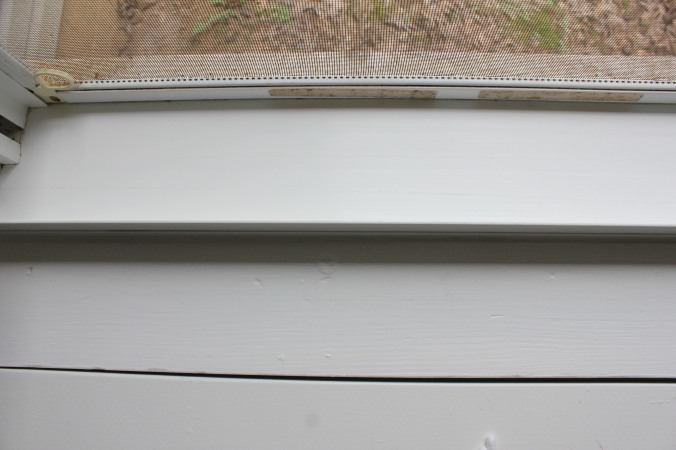
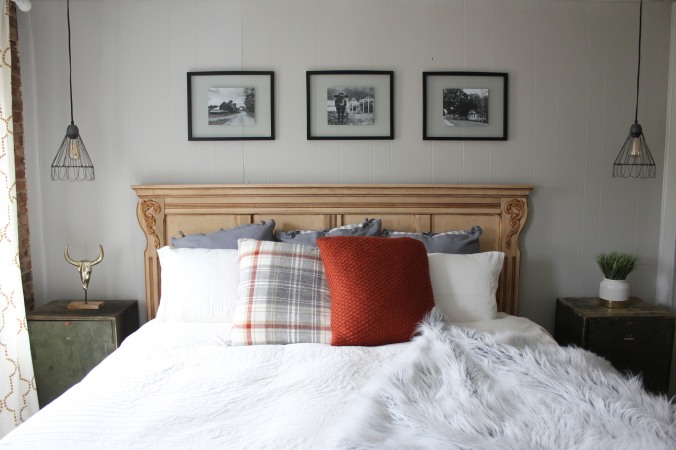
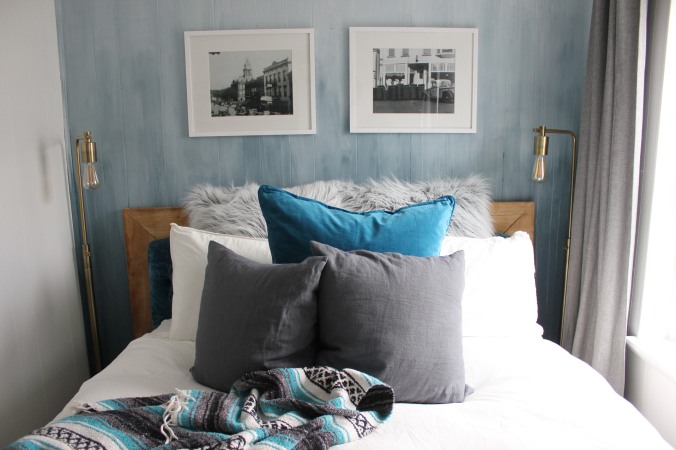
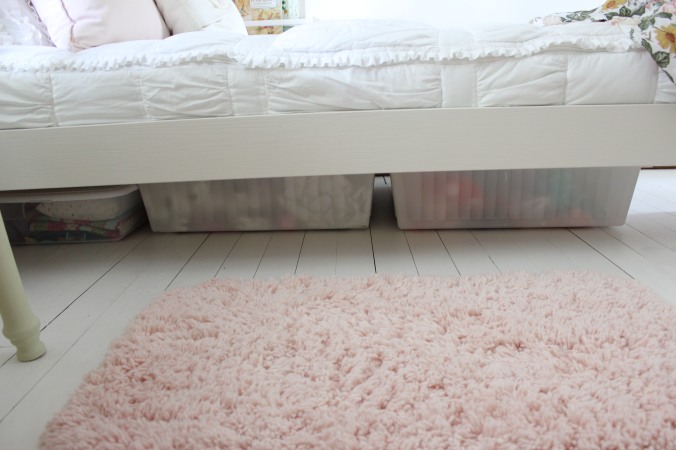
These photos are some what of a transition stage. They’re from right before I started this little makeover. As you’ll see I painted the walls gray and white again but this time I painted them the right shade of gray and white. As I mentioned, these colors were left over from other rooms I had painted (those rooms have also been repainted) and I didn’t love the colors. We had also just bought this Ikea bookcase and had removed her dresser. So again these are just as the makeover was beginning. I’m terrible at remembering to take before photos. I usually just dive right in and get to work.

IMG_6821

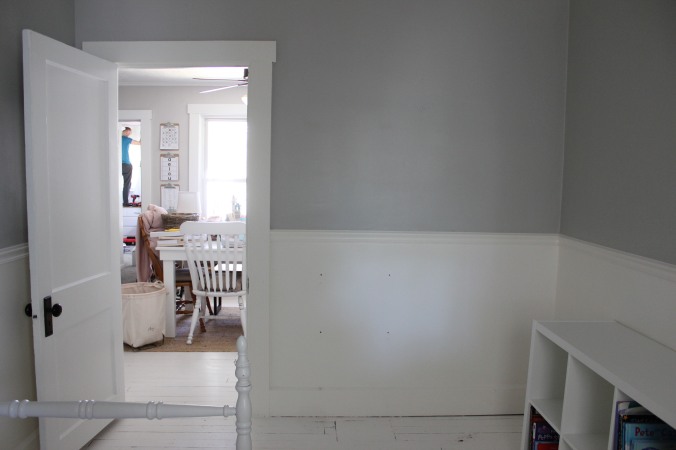
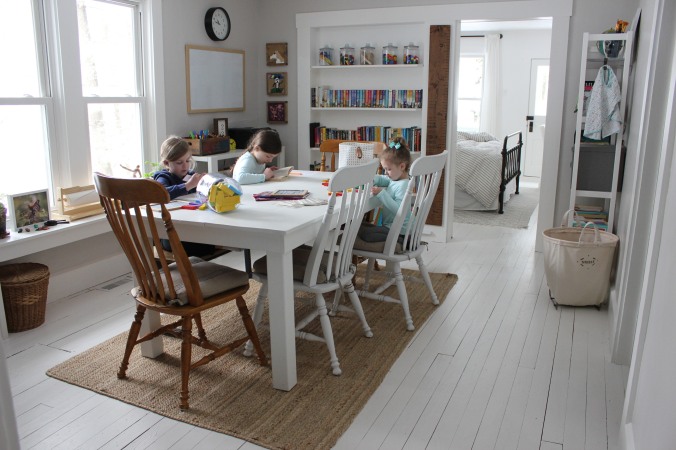
The mess in the homeschool room… room makeovers always tend to throw the home into a bit of a fit don’t they? And theres the Mr. working on the big girls shared room. It will be coming to the blog soon as well!

IMG_7556 1 (1)

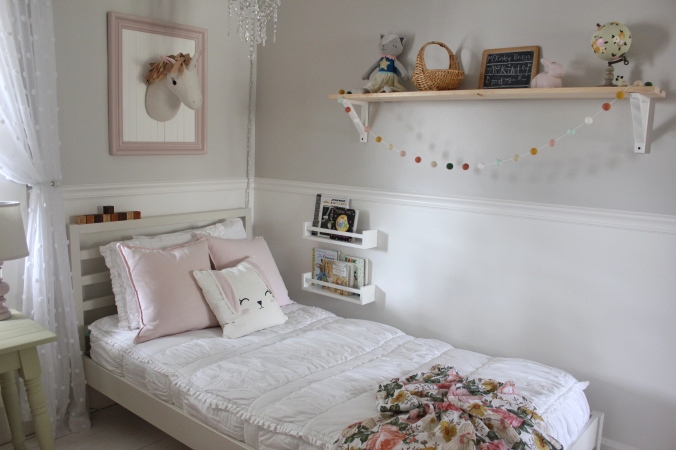
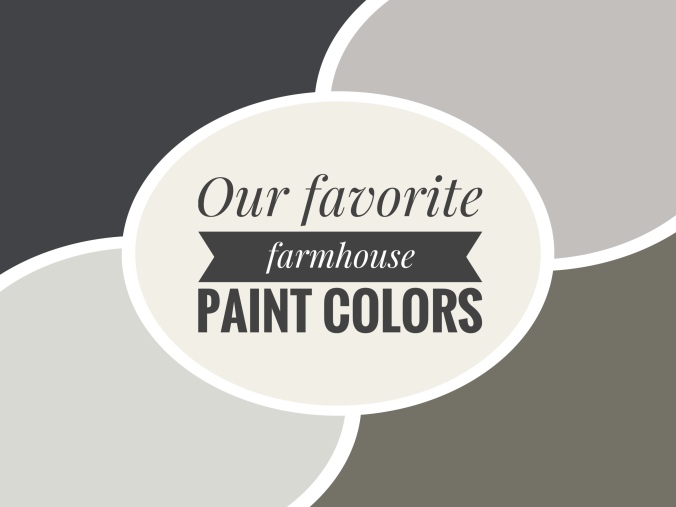
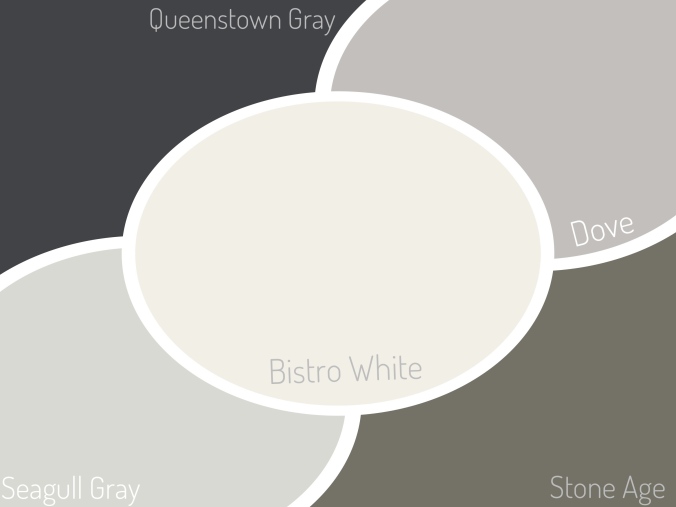
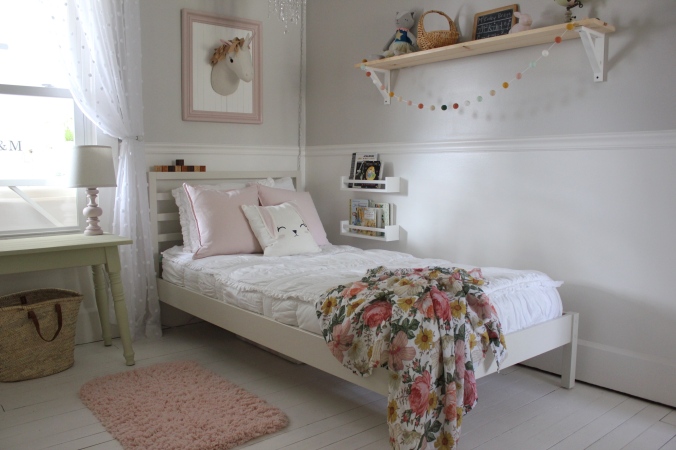
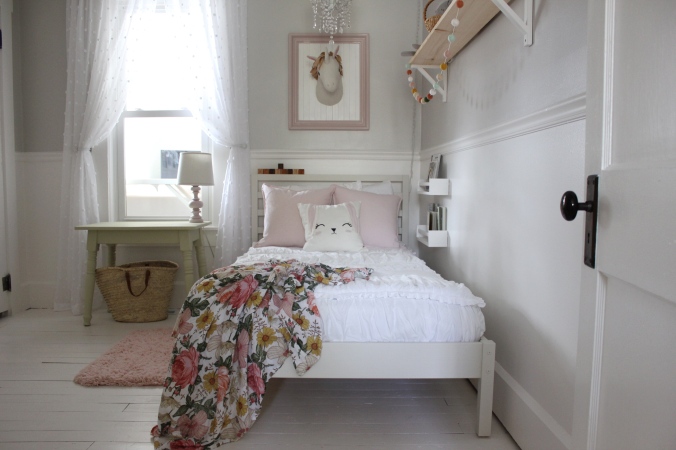
Now onto the good stuff. You guys, I absolutely LOVE the way her room turned out! Its so sweet and I’m slightly obsessed with the colors happening in here. For her walls I used Dove by Behr on the top and Bistro White by Valspar (mixed in Behr paint) on the bottom half. My favorite white and gray colors!

IMG_7477 (1)

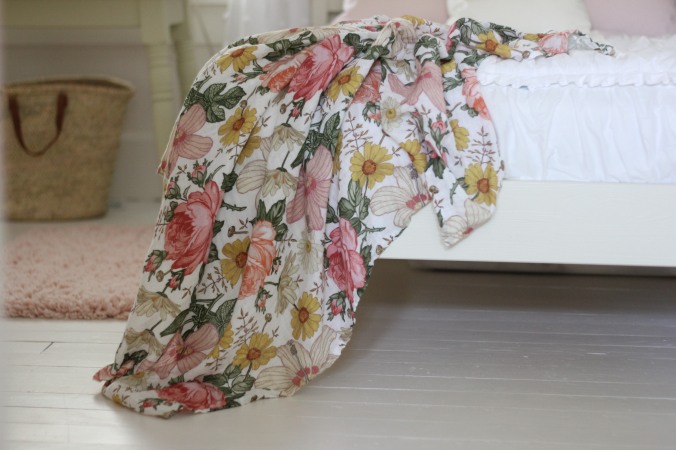
Swaddled blanket turned throw from The Mini Scout. Linked below


IMG_7512 1 (1)

IMG_7480 1 (1)

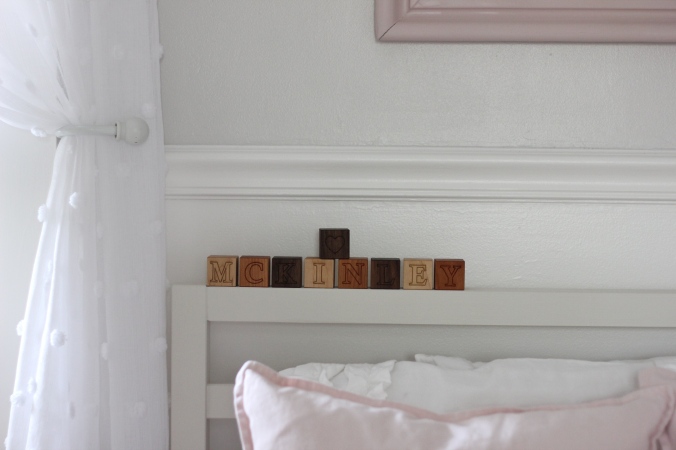
Wooden Name blocks from Smiling Tree Toys. Linked below


IMG_7506 (1)

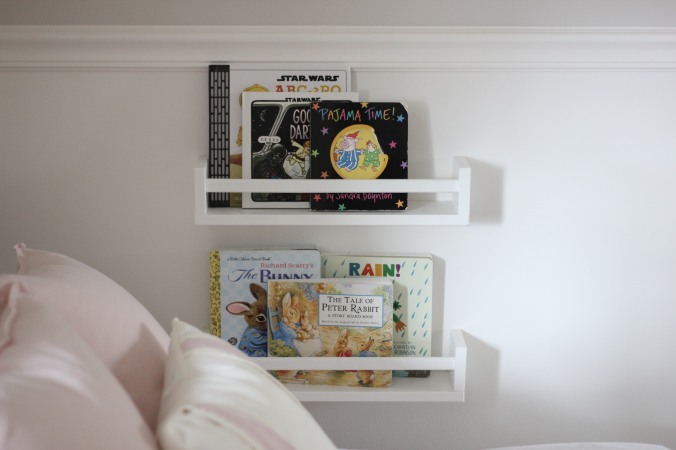
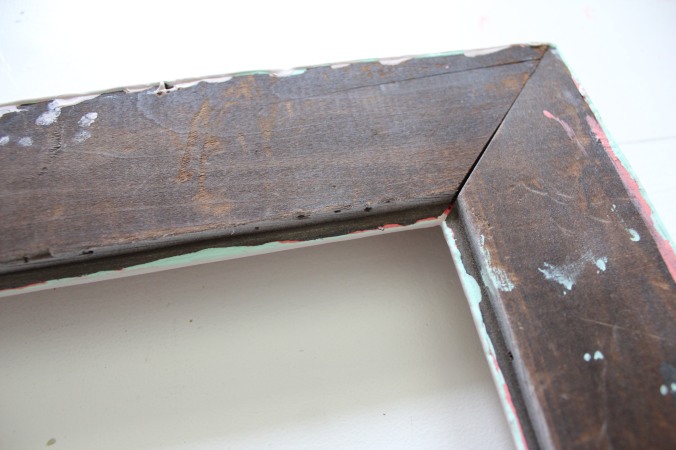
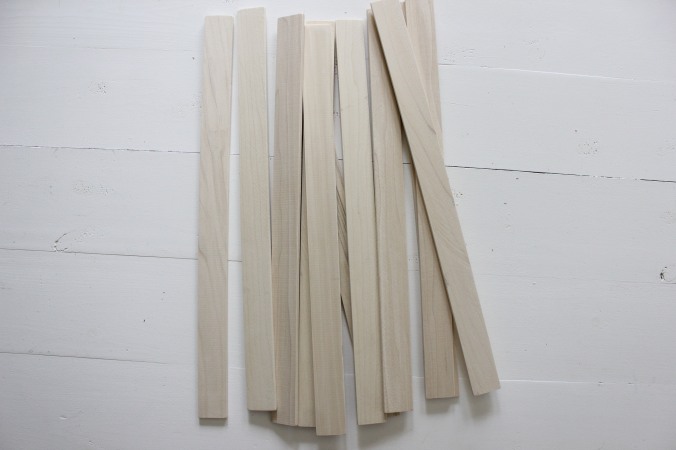
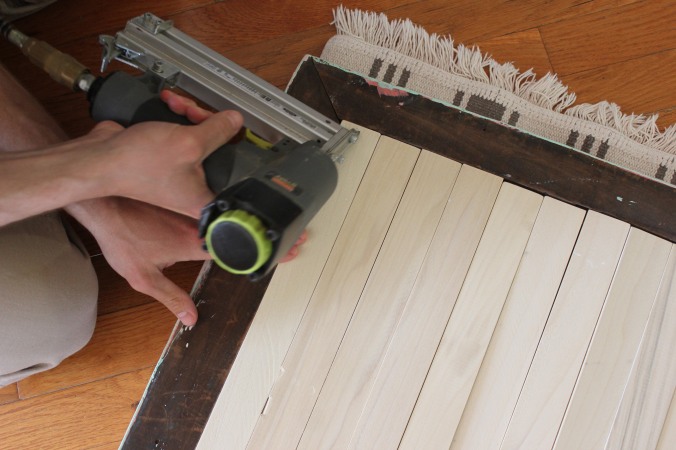
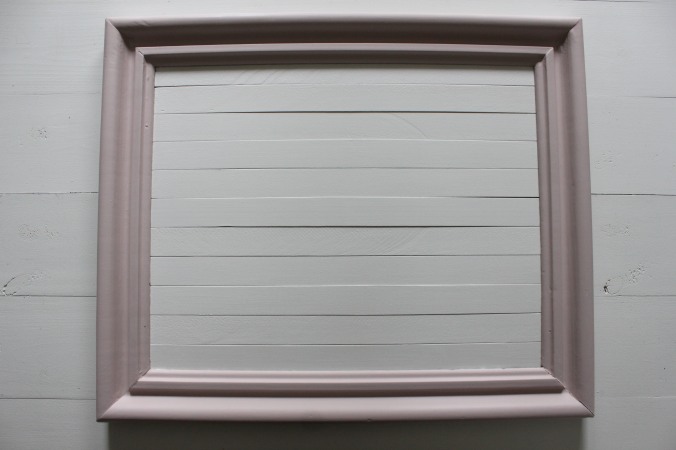
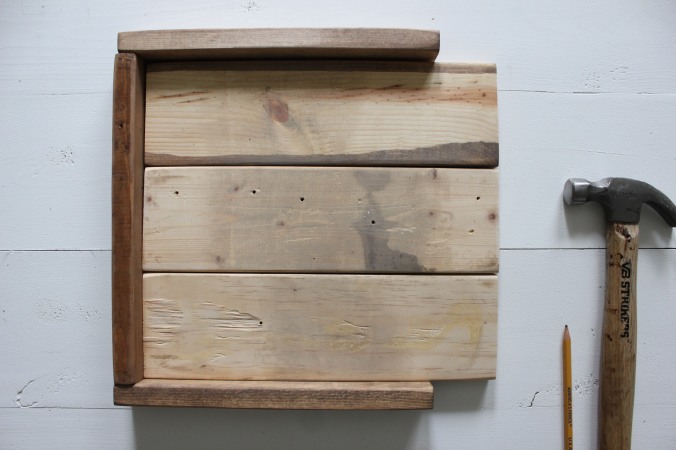
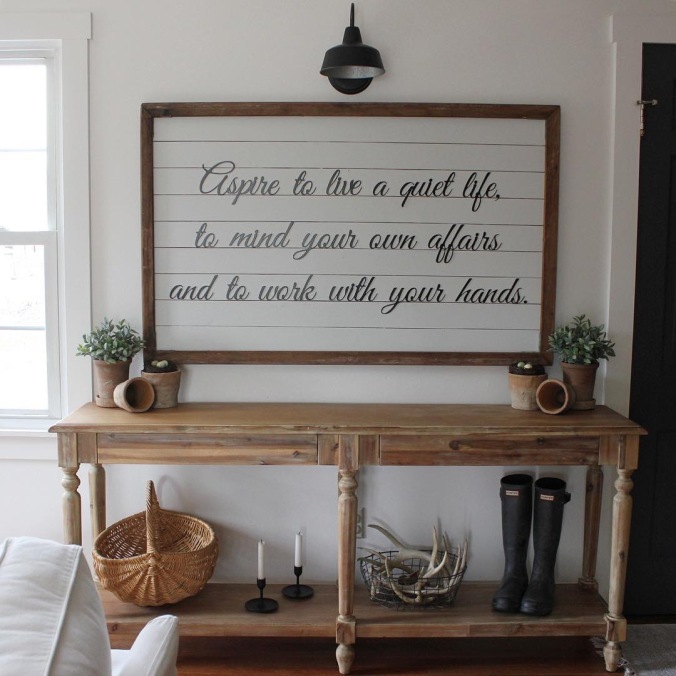
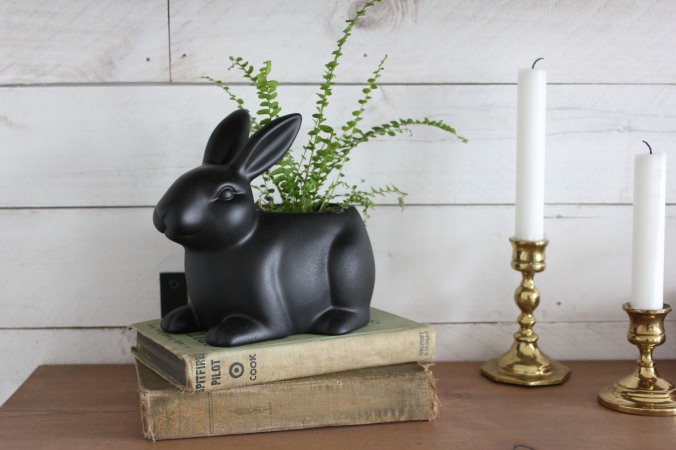
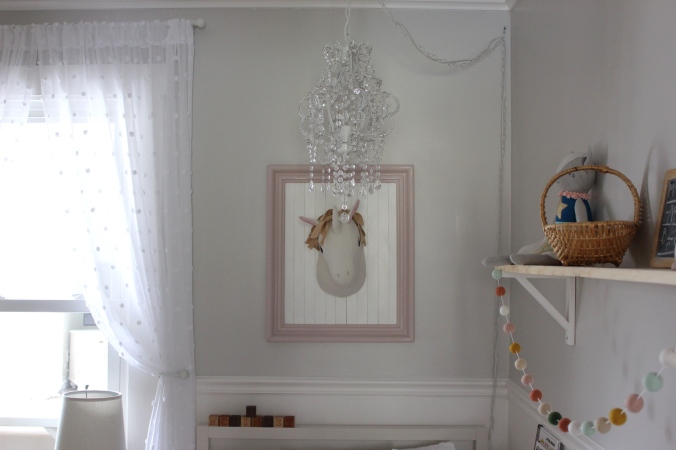
As most of you know, I’m a very ‘attention to detail’ type of person and that followed right into this space. I loved adding little details here and there, things that are unique to M and things that she loves. Her name blocks, a little painted bunny, Ikea spice racks turned book shelves with her favorite books. Of course I added in some fun DIYs too like her framed shiplap (coming to the blog SOON) with her unicorn, a painted globe, her bunny on the wall… this space is full of sweetness, creativeness and lots of cozy.

IMG_7511 1 (1)

IMG_7522 1 (1)

IMG_7520 1 (1)

The green table next her bed was a DIY project. I purchased a round kitchen table from an auction a few summers ago. We removed the legs and frame, cut it to size and made a new top for it. Its the perfect size for her room and she loves having the little table to put books or toys on. I found the color for this table at Hobby Lobby, its Revive by Americana Décor chalk paint. The small lamp on her table is from Target, it had a wood finish base and I painted it using the same color as her frame, Blush Pink by Rust-Oleum Chalked.

IMG_7487 1 (1)

IMG_7525 1 (1)

IMG_7483 1 (1)

Custom garland by Sheep Farm Felt. Linked below


IMG_7482 1 (1)

IMG_7488 1 (1)

IMG_7502 (1)

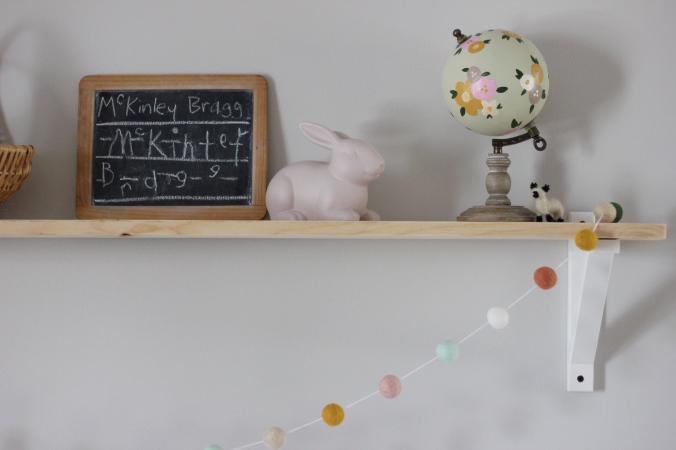
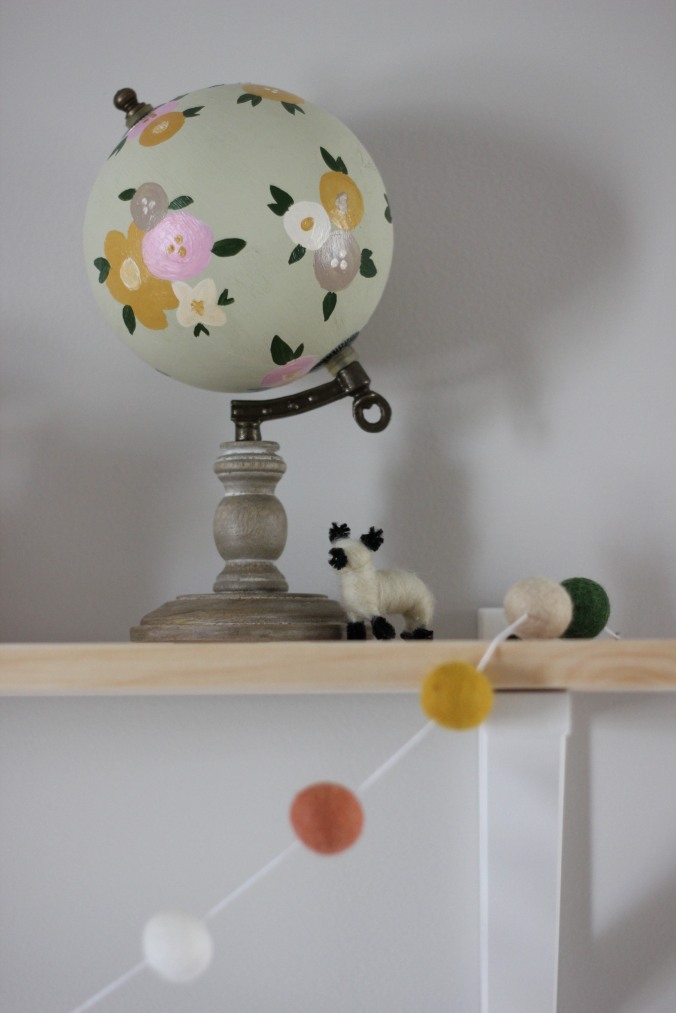
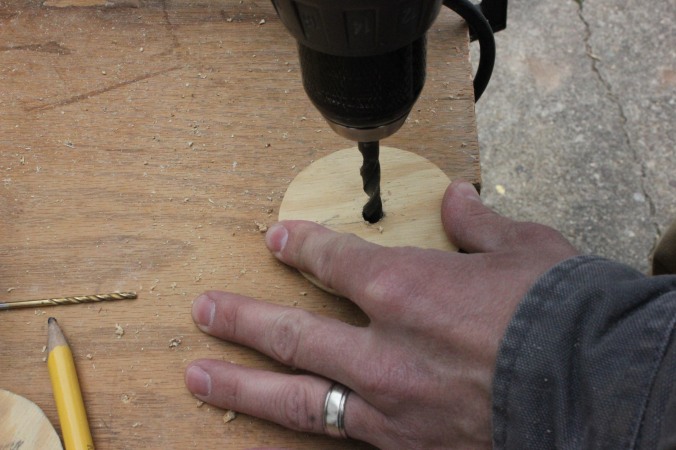
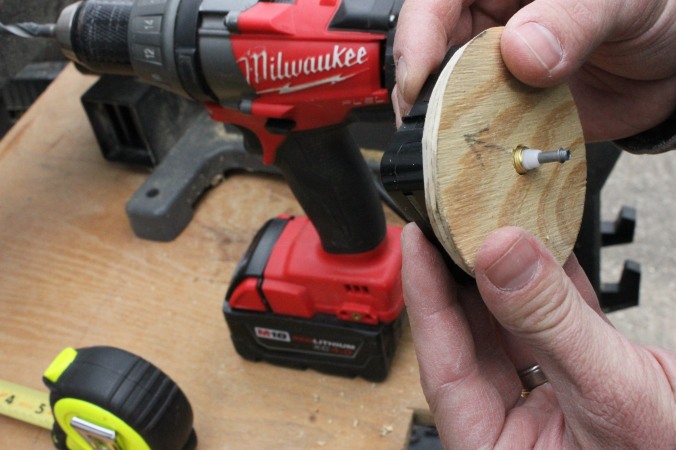
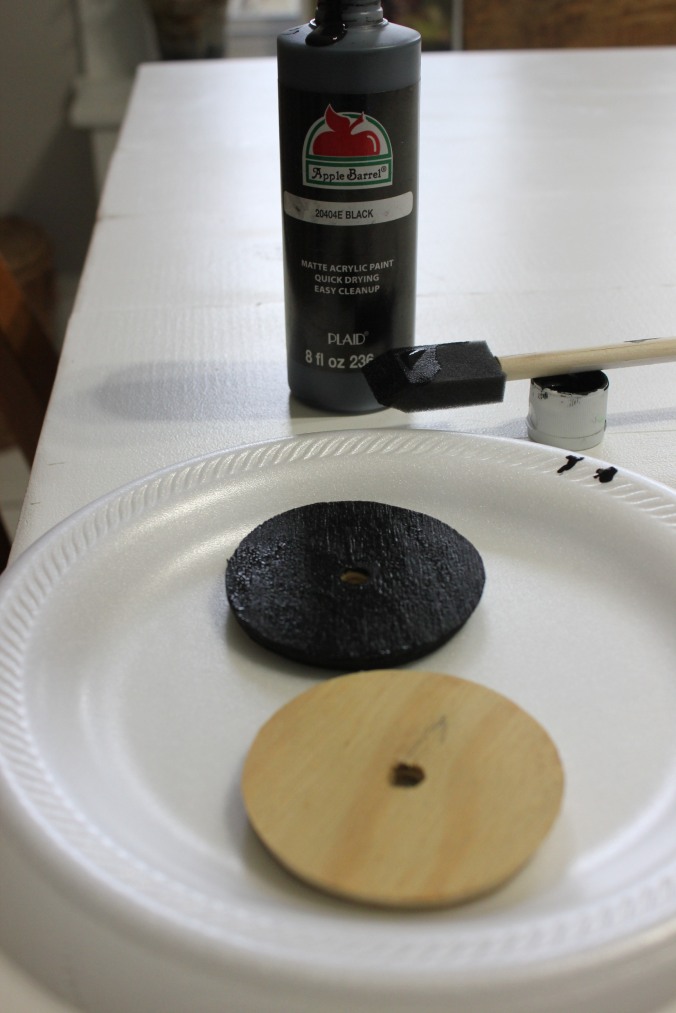
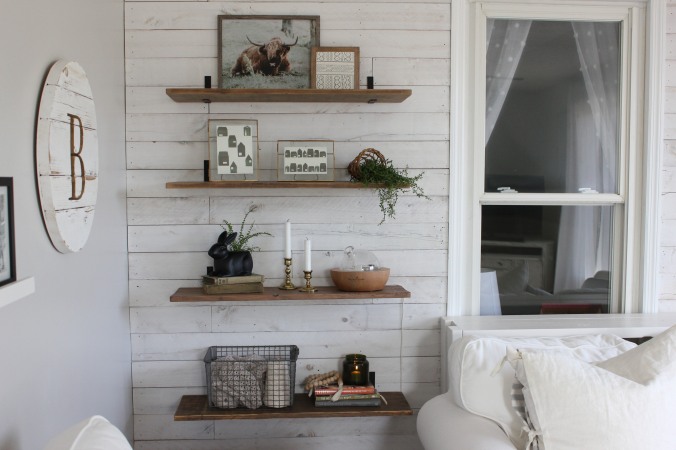
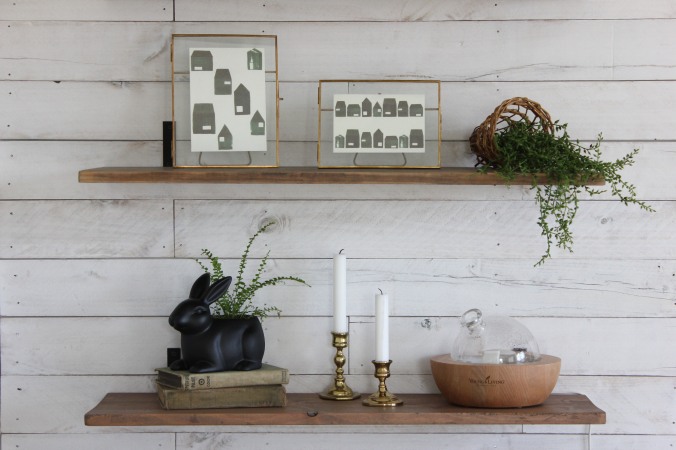
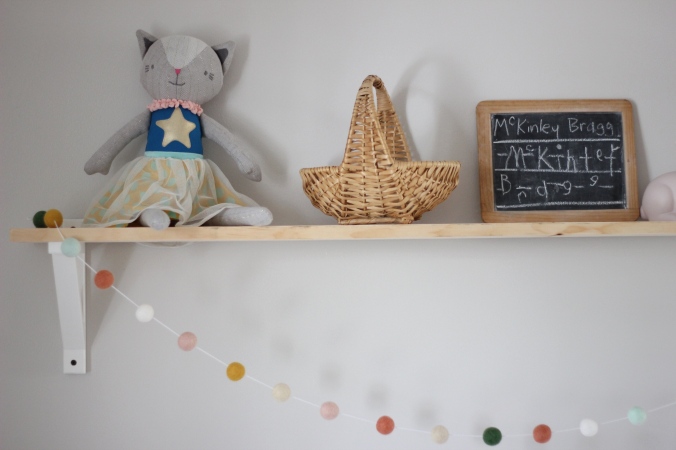
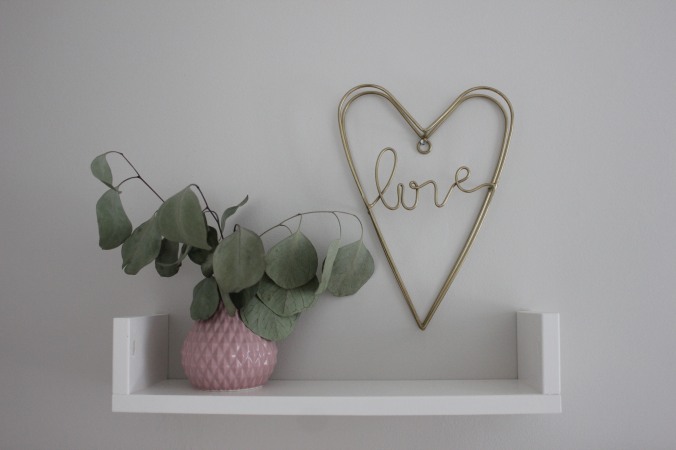
The large shelf in her room was made using wooden brackets from Ikea and a 1×8″ pine board. I decorated her shelf with a vintage chalk board that she wrote her full name on for the first time, a globe I found at Tjmaxx that I painted to match her room, a small ceramic bunny (from Spring décor Transformation), a cat she found at target and fell in love with, a thrifted basket and the Sheep Farm Felt garland. This little shelf is one of my favorite things in her room!

IMG_7504 (1)

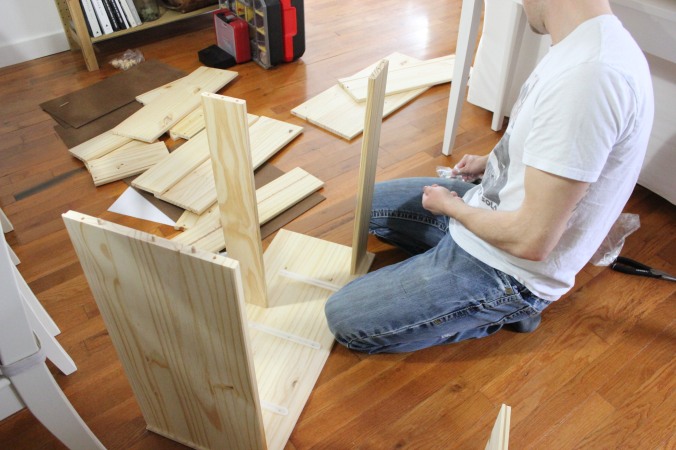
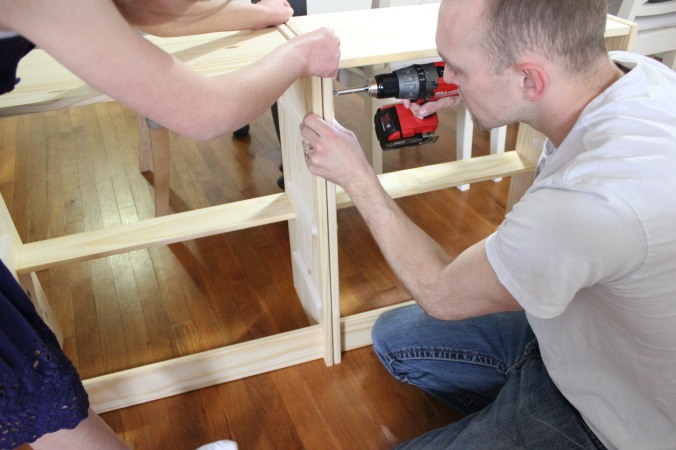
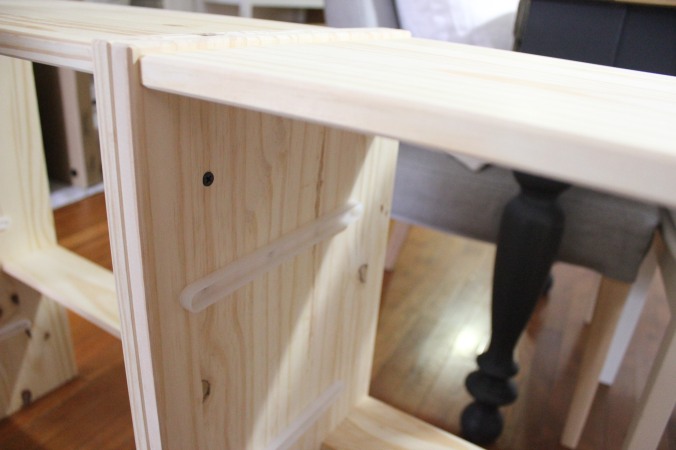
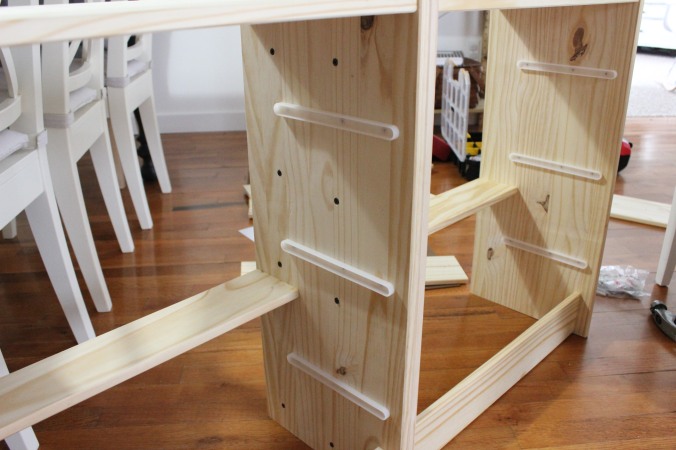
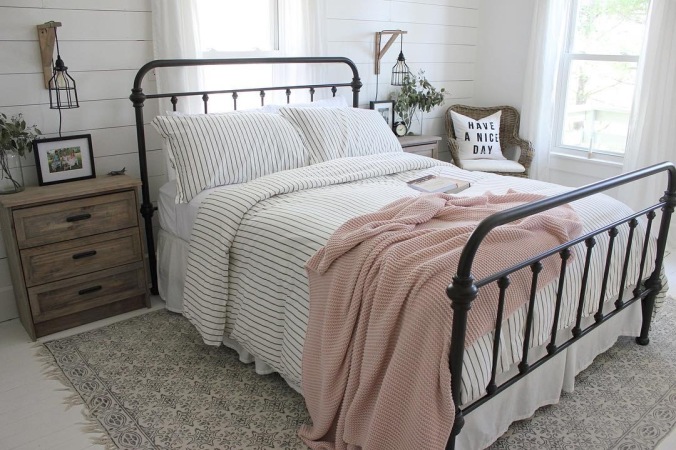
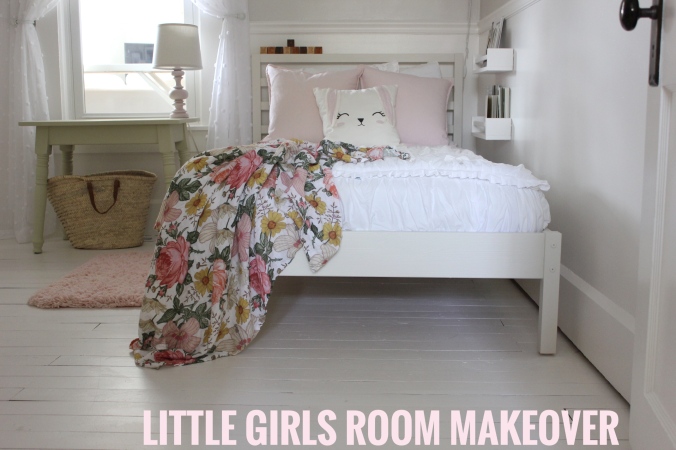
We also bought M a new bed. Before she had a vintage bed with a large head board and footboard. While I loved it and all the charm it had it was just too large for her small space. I found this bed at Ikea, its called the Tarva and it was $79! The bed comes unfinished and I knew I wanted to paint it. I ended up using a color our 10 year old chose, its called Homework and its by Easy Care. I love the soft feel it adds to the bed and it matches her ‘throw’ perfectly.

IMG_7531 1 (1)

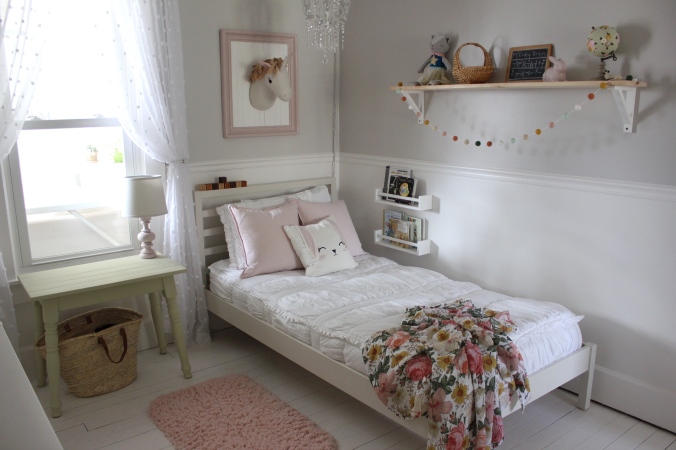
The sweet bedding is from Beddy’s, Chic White is the name of this set. She absolutely LOVES it. If you’re not familiar with Beddy’s beds I highly recommend checking them out! Its all one piece that completely zips! The bedding fits on the bed like a fitted sheet, you simply unzip it to get into bed and when you wake the next morning all you do is zip it up and your bed is made!!! It does completely unzip at the very bottom for easy washing! I love how sweet and simple this bedding is and for a 4 year old, that’s important. No more frustration when it comes to making her bed!

IMG_7554 1 (1)

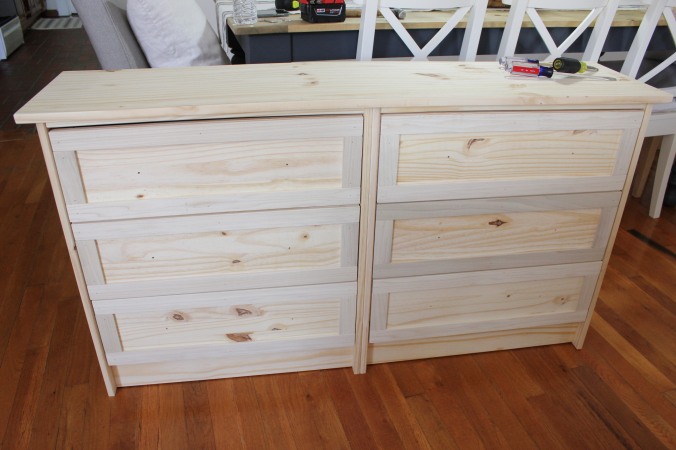
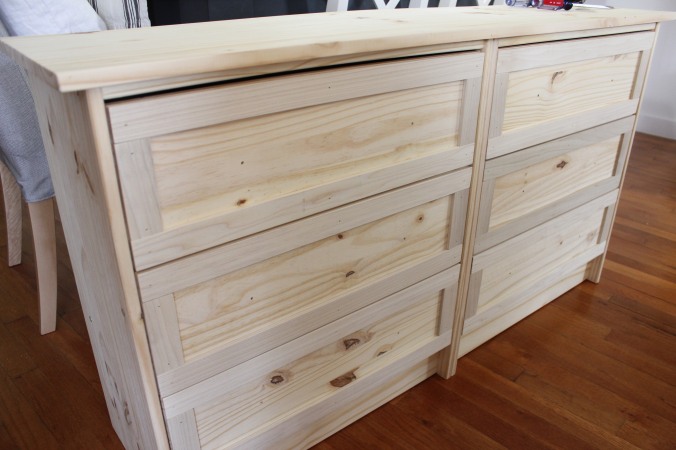
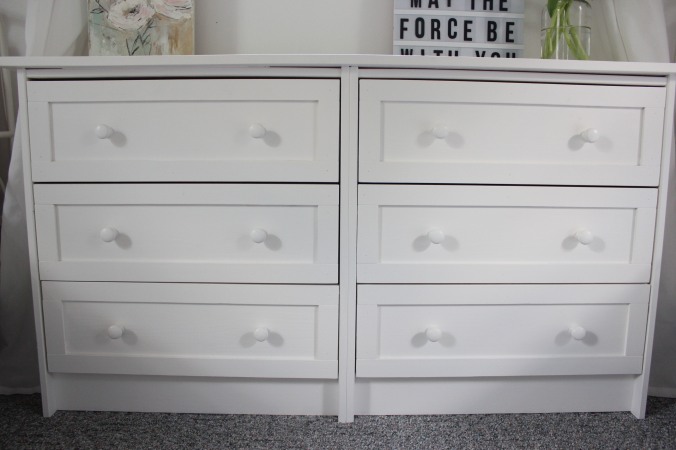
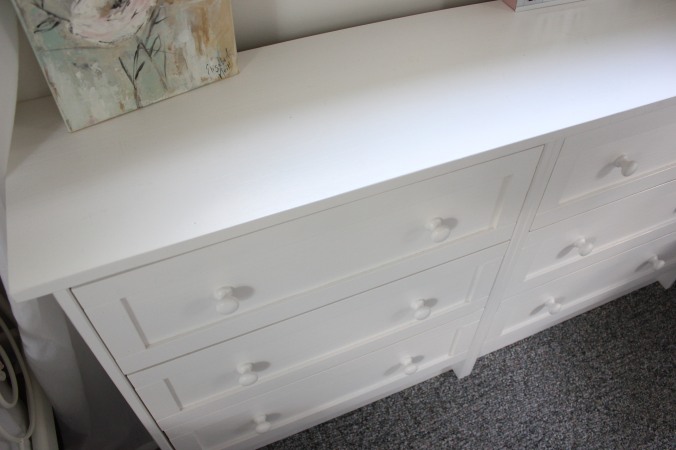
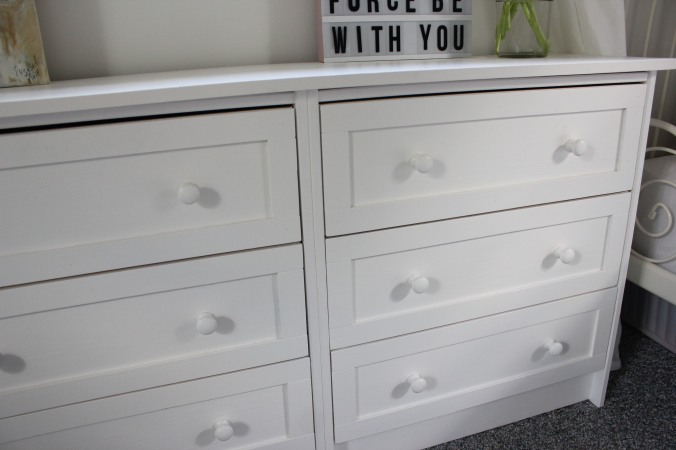
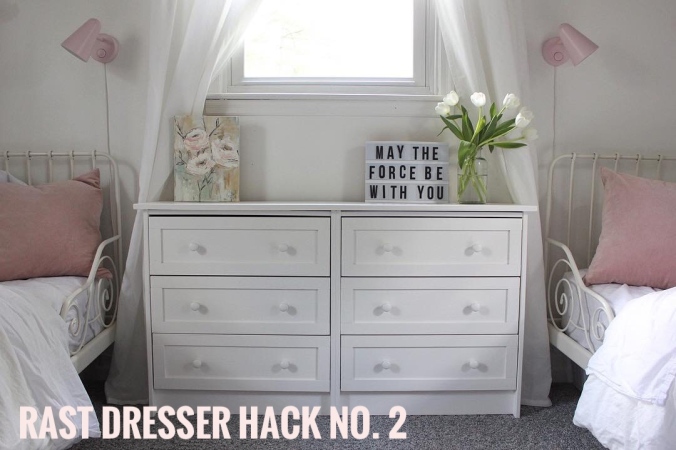
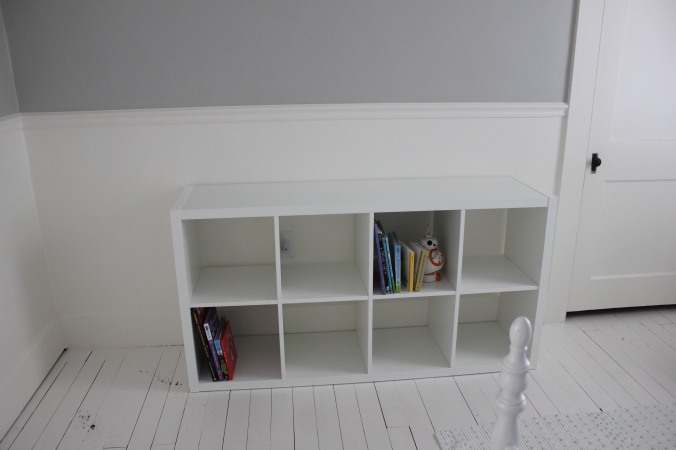
Now lets talk storage in small spaces. M’s room is small, the smallest room in our home minus the bathrooms. I wanted to get as much as we could out of this space without making it feel crammed and cluttered. A few ways I’ve found to help with this are under bed storage containers (found at Ikea), a cubby book shelf with baskets and a small dresser in her closet ( the rast from Ikea). Having these pieces help so much with storing her clothing items and toys without making the space feel as small as it is. With switching to a smaller bed and using the storage options I’ve found, it truly does make her space feel bigger! Plus having a place for everything keeps it organized which always helps!

IMG_7552 (1)

IMG_7572 (1)

IMG_7570 (1)

IMG_7518 (1)

IMG_7545 (1)

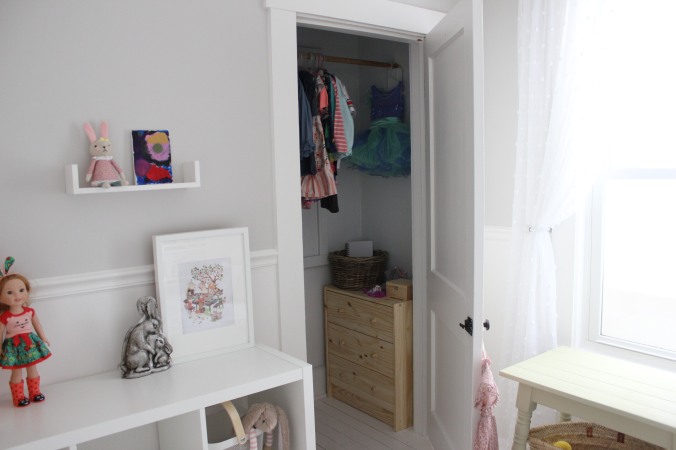
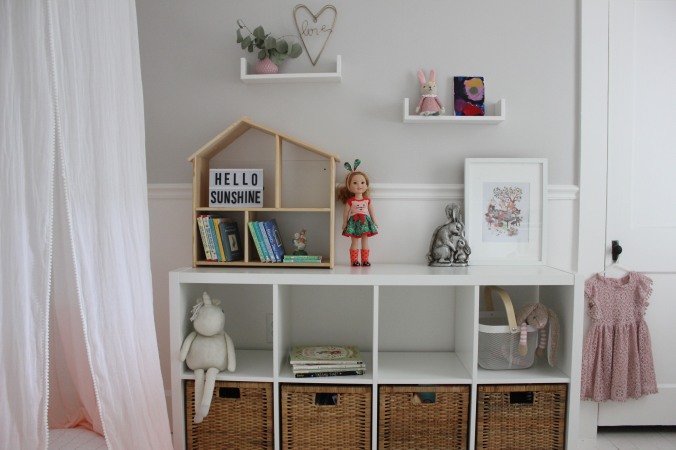
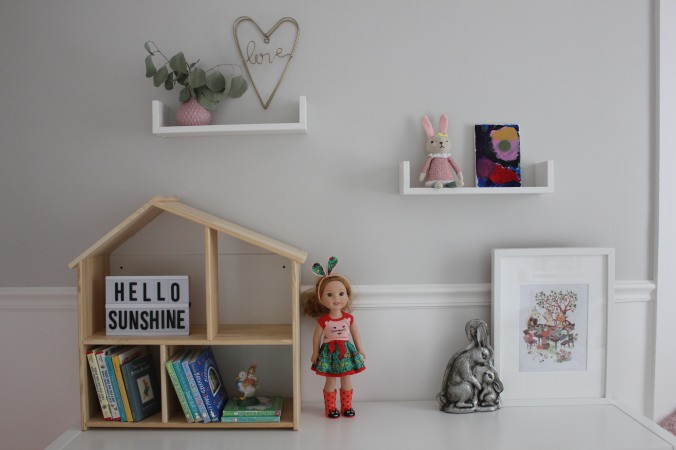
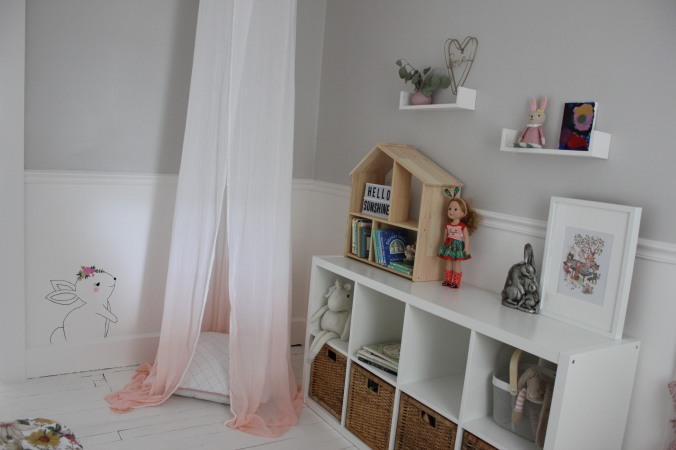
The other side of the room is where the Ikea bookcase sits, I’ve kept this space simple as M likes to move things around and decorate it herself most days. The little white shelves are more of the $3.99 Ikea spice racks, I simple removed the little bar that goes across the front. The wooden doll house is also from Ikea along with the wicker baskets.

IMG_7547 (1)

IMG_7548 (1)

IMG_7549 (1)

Painting by M


IMG_7515 (1)

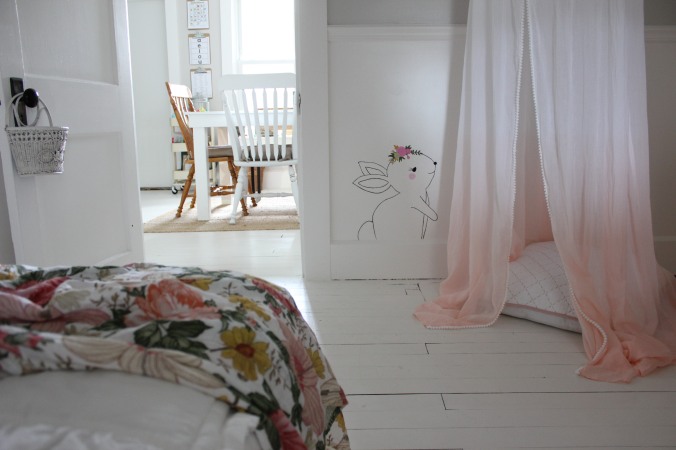
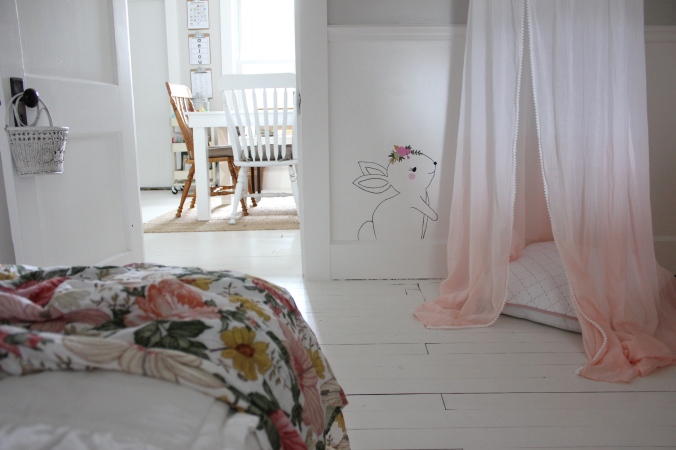
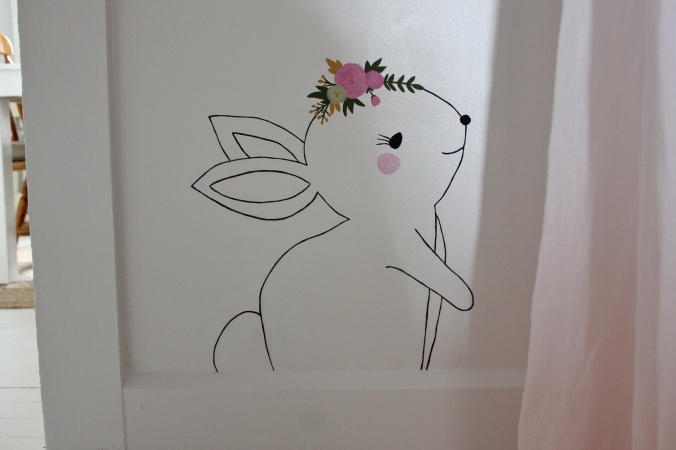
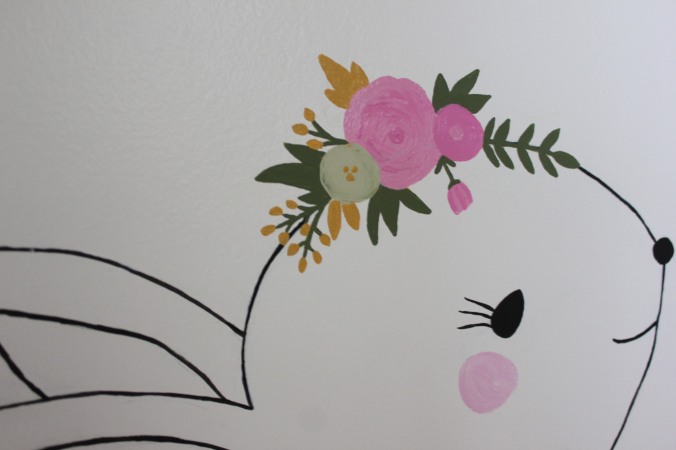
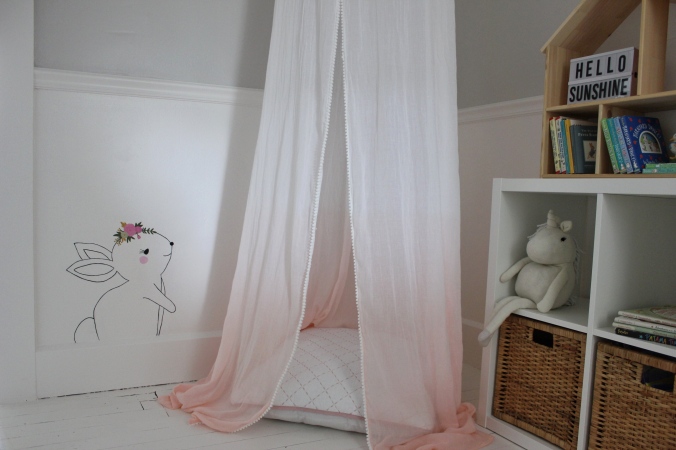
The reading corner may have been one of my favorite areas to work on because of this little bunny. We found the fort/tent at Target and the large pillow inside was a clearance find at Homegoods. For the bunny I simply used paints from different project in her room. The Mr. drew the shape of the rabbit onto the wall for me, I then painted it using black acrylic paint and free handed the flowers on top. It took a few hours to finish but it was so worth it in the end. Little additions like this are my favorite.

IMG_7307 1

IMG_7314 1

IMG_7316 (1) (1)

IMG_7541 1 (1)

IMG_7163

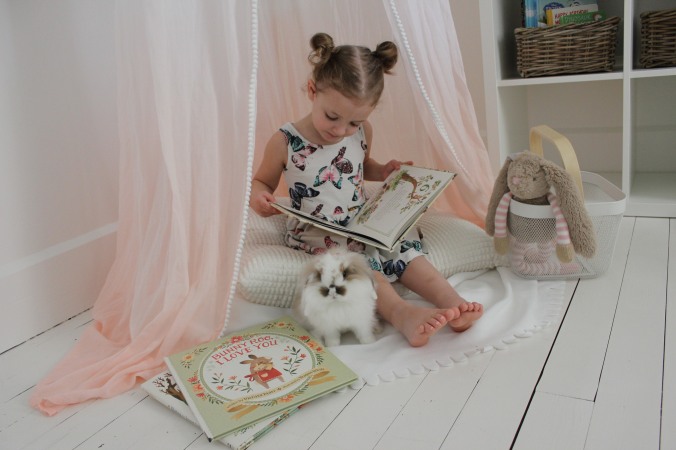
I had to share this photo of Obi (Kenobi). While I was taking photos of M’s room this little guy kept hopping 😉 in to check things out. He loves this space and will quickly sneak in when given the chance!

IMG_2601 (1)

I hope you’ve all enjoyed this ‘Little Girls Room makeover’. I had so much fun working on this space and we have one little girl that absolutely loves her room! My goal was to carry the feel of the rest of our home into this bedroom, simple and cozy. Each space in our home looks different but at the same time they all look the same. They’re different because each room serves a different purpose but they are the same because I have the same goal for each space. Practical, functional, simple and cozy.

IMG_7512

Pin for keeps


As always, if you have any questions please leave them in the comments below or feel free to email me at misdiy@outlook.com. You can also follow the blog by clicking the FOLLOW button on the right hand side of the screen. Find me on Instagram and Pinterest @misdiy! I’ve also shared links for some of the items below.

~Happy Reading Friends


Wooden letter name blocks : Smiling Tree Toys // Swaddle Blanket: The Mini Scout

                           Bedding by Beddy’s: ChicWhite  // Garland: Sheep Farm Felt

Our Farmhouse Style Paint Colors

Choosing a paint color can be hard, its never been my favorite thing to do until I decided to keep it simple and neutral. That for me was a game changer.

IMG_2450 2 (1)

Now if I told you this whole, ‘Find the perfect paint color’ journey for our home was simple, I wouldn’t be telling the truth. When we first moved into our home two and a half years ago I wanted every wall to be some shade of gray (I have no idea why, at the time it just made sense). Y’all know just how HARD it is to find one shade of true gray let alone 5 or 6. I was setting myself up for failure without realizing it. So I painted the interior of our home in shades of gray with ultra white trim and about a year later I painted again. This time I finally felt as if I had finally cracked the code. For OUR home that is. If you’re here reading this, please know that the colors I share today are from OUR home. Colors that ‘I’ have fallen in love with and that work for us in creating a home we love. I’m sharing today because I get soooo many questions about the paint colors I’ve used and I thought it would be perfect to have a general location for all of the information. 😉

20180315_024031570_iOS

It was when we gave our master bedroom a makeover that I truly fell in love with the color Bistro White by Valspar. I remember thinking once our room was finished that we needed this color in more rooms of our home. To me, Bistro White is the perfect cozy white. Not too bright and sterile but not yellow and aged looking. It wasn’t long after our bedroom that I painted our dining room/ sitting area (and the ceiling because at the time it was still pink, yep…PINK (previous owners)). The previous color in our dining room was Silver Marlin, a gray but a gray with blue under tones and I never truly loved it. Repainting the space using the Bistro White gave the room an entirely new look and feel and it was exactly what I wanted.

20180322_102130193_iOS

20180322_102051545_iOS

I’ve also used Bistro white on our floors, to warm up our trim in the home and you may have noticed, I’ve used it on multiple furniture DIY’s. This color is hands down my go to for white!

20180315_034310080_iOS

20180315_024506260_iOS

Our family room is one room that remains a shade of gray from when we first moved in and if I’m completely honest, I’ve been itching to get it painted. I do get a ton of questions about this color so I did want to share it as well. This gray is Seagull Gray by Behr. Its actually on the same color card as Silver Marlin, just a shade lighter. See I tried to make choosing a gray easier on myself by choosing two colors off of the same card. 😀

IMG_0746

IMG_4554

This shade of gray is a light gray, we get a ton of natural light in this room so it actually seems a bit lighter than it really is. Its not a bad gray although it can look as if it has blue/green undertones, but all in all its not a bad choice if you’re looking for a light gray color.

IMG_4437

Our piano… quite possibly my most asked about piece in our home. We’ve had the piano for several years and when we first received it, it was a very deep cherry color. Too red for our home and I knew if we were to keep it and use it, I would have to love it. So as I always say, ‘if you don’t love it, paint it!’ And I did, using Repurpose paint in the color Stone Age. I honestly feel like this color was made for our piano, I love the way it turned out and the finish is smooth as butter!

IMG_4291

IMG_0750

IMG_1893

Another accent color that I’ve used in our home also gets a lot of questions. When we gave our dining room a makeover and built a new table I knew I wanted to add a fun neutral color to let the table stand out a little more, not just blend with our décor. So I chose to use Queenstown Gray by General Finishes. I loved the color so much I painted our front door with it and an old thrifted frame that sits on our piano.

IMG_0968

IMG_0748

IMG_4303

There is one color, an original to us moving into our home, that I still love. My favorite gray to date and its Dove by Behr. Our homeschool room is painted this color of gray and just recently I painted our youngest daughters room the same shade of gray. Dove for me is one of the closest grays to a ‘true’ gray. I love the shade and tone of the color. Its so soft and cozy. It almost seems smooth like clay when you look at it, if that makes sense. I know it seems odd to talk about paint colors that way but when I look at the color, that’s what I think of.

IMG_6643

(A little sneak peek of our 4 year olds room makeover that will be coming to the blog very soon)

IMG_7307

Choosing paint colors can be hard, but it doesn’t have to be. There are so many bloggers now that share their favorite colors its almost as if the work is done, which makes it so much easier when it comes to choosing paint colors for the first third time. One thing I’ve learned about choosing a gray, look at where you’re pulling the card from. Most stores have their colors set up in reds, yellow, greens, browns, purples, blues… stay close to the browns and whites. Look at the darkest gray on the card and compare it to a true white, an ultra white, you should be able to easily see the undertones. If you notice my little paint graphic below you can pick out most of the undertones in each color I’ve shared. The bistro white has a yellow under tone but it doesn’t cast any yellow when on the wall, this is what makes it a warm cozy white. The dove looks gray with a small bit of brown undertones, you can see green in the Seagull gray, blue in Queenstown gray and brown in stone age.

IMG_2450 1 (1)

Pin Image to save blog post

I hope you’ve found today’s blog post helpful and if nothing else at least now you know all the main colors in our home. 😉 As always, if you have any questions please leave them in the comments below or feel free to email me at misdiy@outlook.com.

***A little announcement I wanted to make today, I’ve started doing a little read along over on Instagram where I choose a book each month (or so) to read and as a group we read it together and I check in to chat about what we’ve read. If you’d like to join the read along please send me a DM on Instagram, Id love to get you added in. Our new book, starting Monday 4/23 is Grace, Not Perfection by Emily Ley. I picked my book up at Target but like with most books, it can be found in multiple places.

~Happy reading friends

DIY Farmhouse Style Clock

As you may already know, we love filling our home with DIY’s and unique finds. Our clock is one of our DIY’s that’s most asked about and today I thought I would share exactly how we made it.

IMG_6318

The first thing you’ll need to do is locate a spool that is the appropriate size for your space. I have a friend that works for a cable company and he was able to supply me with the spools I needed. I’ve also been able to get smaller ones from Lowes when they are emptied of their wire, just ask! If you have a local cable company, stop in and ask them if they have any available. Normally they just pitch them.

Once you have your spool you’ll need to disassemble it since you only need the end piece, and bonus if you have a friend also wanting a clock, since there are two ends this is the perfect DIY for two!! Now for the numbers, there are a few ways you can do them. I made stencils using my cri-cut, you can also buy stencils, print and trace numbers or as you’ll see later in the post, we used house numbers from Lowes for our personal clock.

IMG_5043

IMG_5042

IMG_5047

IMG_5045

Trace all of your numbers on and then you’ll paint them. This step is fairly easy just a little time-consuming. For the numbers I just use a simple craft paint and a small artist paint brush.

IMG_5046

The next step is cutting the center piece that will hold your clock parts in place. We use 1/4″ plywood to make the center. You’ll want to lay the clock onto the plywood and trace the hole for your guide line. Once you have your hole traced you’ll use a jigsaw to cut out the circle.

IMG_6484

IMG_6487

IMG_6491

Next, check your center piece on the clock, it will end up being a little bigger so you’ll need to sand it down a little and check it again. This takes a little time to get it perfect, just make sure you sand a little at a time and recheck often so that your center piece doesn’t become to small. You’ll want the piece to fit snug without being forced. This will help later in the glue process.

IMG_6495

IMG_6493

Now you’ll mark the center hole for the clock motor. Measure the diameter of your circle to find the center point. This is important to make sure your motor is lined up to move your hands around the clock correctly. Once you’ve found the center you’ll want to drill a hole. Make sure that the drill bit you use is large enough for the arm of the motor to fit all the way through.

IMG_6496

IMG_6502

Be sure to check that the motor fits before moving on. Its much easier to make your adjustments now before the next few steps!

IMG_6501

Once your center piece fits into your spool top and you’ve double checked that the motor fits into the center piece you’ll want to paint it. Again I chose to use the same black craft paint that I used for the numbers.

IMG_6570

After the center piece has dried you’ll need to use wood glue to attach it to the spool top. Because of the snug fit you should have achieved there will be no need to clamp or add any extra support while the glue dries. Just be sure not to use too much glue where it pushes through the front and ends up on your clock, if this does happen be sure to quickly clean it up. Let the glue dry over night. Then you can add the clock motor and hands.

IMG_6677

IMG_6673

I was able to find the clock parts at Hobby Lobby, they’re about $20 but if you use your 40% off coupon you get them for around 12 bucks! I’ve seen other clock parts on amazon as well if you are looking for a different style. To hang our clock we used D hooks and heavy wire. You can use the D hooks by themselves if you’d like but we prefer one hole in the wall rather than two, plus one is so much easier to get right. Lol

20180315_025649810_iOS

I hope you’ve all enjoyed this little tutorial and for those of you that have been waiting FOREVER for me to share, I’m so sorry! It has taken me far too long! That fact that this clock of ours is over two years old… yea, I’m sorry. But it’s here now and yay you can finally make one. 😉

IMG_6477

As always, if you have any questions please leave them in the comments below. You can also email me at misdiy@outlook.com. Follow along on Instagram and Pinterest @misdiy and to be sure you don’t miss any of my tutorials and home tours, be sure to follow the blog via email. (You will ONLY receive an email when a new blog post is published!)

~Happy Reading Friends

Spring Home Tour

Two days into Spring and I’m finally getting around to sharing our Spring Home Tour! I’m truly excited about this little tour, for a few reason I think…

20180322_102333473_iOS

The biggest reason is, it’s finally Spring! This winter, like most Ohio winters has felt like a life time of winters. To say I’m sad to see it go, would be a lie! I’m 100% in full motion to spring and all things green and warm! 😉 This year, our home looks a little different for this season. Not only have we made a few changes around our home but this year for spring I’ve been craving natural, organic and simple things. I hope in this little tour of mine, you see the feeling I’ve tried to create in our space. Always cozy and function with natural elements and lots of greenery!

20180322_102051545_iOS

I think the best spot to begin this tour is right at our front door. I always have fun with these tours trying to make them as realistic as possible so of course I want you to see each space as if you’re actually walking through our home! Our entry way, for spring, didn’t get much more than some greenery. I think I’ve shared this old fishing basket that I’m obsessed with before, the crock was an antique find and I simply filled it with some eucalyptus and let it dry out. The tea towel is from the Target/Magnolia line and the bench was a DIY project, our first one in this home.

20180321_233247920_iOS

Our entry table is from World Market. It’s the Everett foyer table and its one of my favorite ‘store’ pieces. The framed shiplap was a DIY almost two years ago and although I’m way behind sharing it (and keep promising I will) I do plan to get it on the blog as soon as we get some warm weather and can get in the shop! My favorite part about the framed shiplap is the collaboration with Vintage Metal Co. to turn it into this gorgeous sign! I absolutely love it!

20180322_002422290_iOS

I’ve collected some terracotta pots from various places, some Hobby Lobby and Target but they were a large part of my spring décor this year! One of the ‘organic natural’ elements I wanted to incorporate. I also added some greens and bird nests.

20180317_223133700_iOS

Our dining room was mostly filled with greens and a couple small pieces I picked up recently. Again in this space I wanted to bring the outside in, keeping it simple and cozy. Ferns are PEREFECT to add to any space, they’re one of my favorite house plants next to my fiddle leaf fig. The artificial greens stuck here and there are from Hobby Lobby. I tucked them in bowls and hung a couple from little beehive baskets just for fun.

20180315_024031570_iOS

20180321_233326440_iOS

20180322_001126240_iOS

20180322_102403024_iOS

20180322_002148630_iOS

I love all of the simple touches of spring in our dining room. It may not be the first thing you notice in the space but when you sit down at our table to eat or visit you start to notice the bird nest in the cup or the little vine creeping out of the dish. Subtle touches are quite possibly my favorite, details that catch your eye and cause you to pause even for just a minute to take it in.

20180322_001811240_iOS

20180322_002101180_iOS

20180322_000042450_iOS

20180315_024506260_iOS

Our sitting would be the next room to walk through, I have to say there’s something magical about the way the sun fills this space in the spring and summer. The room always seems to just come alive.  In this space I added some spring inspired pillows, blush and navy blue with floral, a couple of new plants moved into the space and I found the cutest lady planter at Hobby Lobby! I waited weeks after seeing it for the first time to actually buy it. I kept telling myself that I didn’t need it but for whatever reason I couldn’t stop thinking about how cute it would look with a fern in it! So now the lady planter rests on our mantle.

20180322_102522031_iOS

20180315_025649810_iOS

Our piano is always a fun piece for me to decorate, it’s basically a bonus shelf that makes beautiful noise. Again I’ve added some dried eucalyptus, its one of my favorite things to add to our home, a spring phrase to the letter board, a dark green candle holder found at the thrift store and one of the bunnies I shared in my Spring décor Transformation post.

IMG_1893


IMG_1892

My favorite room to decorate this year for spring was our family room. I may have went a little crazy trying to create a greenhouse feel but I enjoyed every minute of it. By simply adding terracotta pots, a few plants, bird nests and a couple of beeswax candles I was able to achieve the look and feel I was hoping for.

IMG_1896

20180322_102205270_iOS

20180322_101920118_iOS

20180322_102245748_iOS

Onto our master bedroom, our little retreat at the end of each day. There have been a few changes in this space recently, a painted door, new mantel and new bedding. I truly didn’t think I could love this space anymore than I already did but I do. This duvet cover from H&M is my favorite by far and the painted door makes this space feel so fresh and clean, perfect for spring. Again, simple touches in this space with dried eucalyptus and blush accents. The gorgeous blush throw is from Ikea and I love it so much that we have two!!

IMG_5589

20180315_034310080_iOS

20180322_102130193_iOS

20180322_102436371_iOS

That’s it friends, our little home all decorated for spring and so ready for its arrival. I guess I should say so ready for mother nature to get the memo that spring is here! 😀 I hope you’ve all enjoyed this little tour and I can’t wait to share more of our home with you all over the next few months! We are tackling our master bathroom makeover and giving our daughters rooms a refresh! You know I’ll share it all here on the blog to take you along with our little journey of creating a home we love.

As always if you have any questions please leave them in the comments section below or email me at misdiy@outlook.com. You can also find me on Instagram @misdiy and you can follow along with all my favorite things on Pinterest @misdiy. I’ll leave you with a sweet photo of our newest bun Obi(wan).

IMG_6695 1


~Happy Reading Friends

Spring décor Transformation

Happy Tuesday friends. When it comes to seasonal décor I like simple pieces that provide the look I’m wanting but don’t cost a lot money! I was excited this year to be able to simply transform a couple of pieces and achieve the look for only a few dollars!!

IMG_6600

When the Mr. and I were on our little anniversary getaway we stopped by a store that was full of farmhouse goodness! While we were there I spotted a beautiful black bunny figure and fell in love with it, although I didn’t love the $30 price tag. Don’t get me wrong here, it was a beautiful piece and normal $30 is a reasonable price but when it comes to seasonal décor I don’t like to spend a lot of money knowing it will only be out for a short amount of time. I think I’ve shared before how I love to go to Target and scan their ‘once was’ dollar section. They always seem to put out super cute seasonal pieces and at an awesome price. Well a couple of weeks later I did just that and found these sweet ceramic bunny figures! I loved them but they weren’t exactly the style I was wanting.

IMG_5542

IMG_5541

IMG_5540

So what do I do when it comes to easily transforming something so that I love it more? I usually paint it! 😀 And I did exactly that to these little bunnies and I got the exact look I was going for, for only a few dollars!

IMG_6622

IMG_6619

These rabbits were only $3 each and I already had some flat black spray paint on hand so the transformation was very simple and I absolutely love the way they turned out!

IMG_1896

IMG_1892

Are these rabbits exactly like the one I found in the store? No they’re not but for $6 and a little spray paint I’m super happy with the end results! Also I don’t have to feel bad if I decide next year that I no longer like them! I’m well-known for switching things up often so keeping our décor budget friendly is a must, plus I like to create a cozy home and then have money left over for a pizza! 😉

IMG_6609

I hope you’ve enjoyed this super simple spring décor transformation and I hope it inspires you to create seasonal décor you love without breaking the bank! If you aren’t a fan of flat black, have fun with color! I even thought about spray painting one all white and one a very soft pink to use as décor in our little girls room! The possibilities are endless here due to the wide variety of paint colors! Which is why I’m a huge fan of paint, it’s the easiest way to make something new again!

IMG_1893

I hope you all join me this week for our Spring Home tour and until then, as always, if you have any questions please leave them in the comments section below or email me at misdiy@outlook.com. You can also find me here, on Instagram and Pinterest @misdiy!


~Happy Reading Friends


11 Years

Its funny how an amount of time can seem to have flown by and at the same time it can seem as though its taken forever.

IMG_5534

That’s how I feel when I think about the 11 years the Mr. and I have been married. We just celebrated our anniversary over the weekend and it was so fun! I’ll spare you all of the details about how we’ve known each other since we were kids, how our friendship went from just that to where we are today, how my husband has taught me so much about life and love in these 11 years and of course how amazing our little family we’ve created is. 😉 I’ll spare you. But I did want to share our little trip with y’all!

My friend Alyssa, you may know her as Cotton Wood Shanty, and her husband own a flat in down town Millersburg, Ohio right above Farmhouse Frocks. Its been a running business for people to book a stay for about a year now. I always thought it would be so fun to visit so I took the opportunity for our anniversary, and I’m so glad I did!

IMG_5508

Alyssa and her husband have done a beautiful job on the ‘Urban Flat’ she has an amazing sense of style and it shows throughout the space! I love her mix of vintage, modern and DIY.

IMG_5502

Not only does Alyssa own and run the flat, she also has a photography business and makes gorgeous scrolls to use as décor! You can find her shop here: Cotton Wood Shanty.

IMG_5511

IMG_5514

My favorite thing about this stay was the fact that we didn’t feel like we were really ‘staying’ somewhere, if that makes sense. Alyssa really made the entire space feel like home. From the cozy beds, Netflix on the TV to a keurig in the kitchen!

IMG_5531

IMG_5512

There are two rooms in the flat and I gave the Mr. the choice of the two… he chose the exposed brick!! Which happened to be my favorite little detail along with the cozy bed and vintage pieces! (I forgot to take a photo from the windows but you can see all of the sweet little downtown area!)

IMG_5517

IMG_5518

IMG_5524

The other bedroom was just as beautiful as the first! I absolutely love the blues in this space and the coziness it adds.

IMG_5523

IMG_5519

We spent the entire next day exploring the area and I have to say it was perfect. From a little brewery to the Olde World Bakery and antique shops, I was on cloud nine! We were able to walk to all of these areas right from where we woke up and I loved how simple it all was, no jumping in and out of the car or looking for a parking space.

IMG_5539

We enjoyed a delicious breakfast from Olde World Bakery before exploring the antique shops, that were FULL of awesome treasures. We also visited Farmhouse Frocks and Modern Farmhouse, which I LOVED! Everyone we met during our stay was so friendly, we even ended up getting to know one of the shop owners for well over an hour! 😀 I love when things like that happen!

IMG_5538

Our trip was perfect, slow and simple. It really gave us time to slow down and just enjoy each other. Over meals and drinks, walking in the rain (because that’s all we’ve seen here in Ohio for weeks), talking without interruption, no hustle and bustle of the day, just being together in the slow hush of things. Exactly what we needed. And then we raced home to our sweet babes and life started again.

IMG_5536

I hope you’ve enjoyed seeing a little behind the sense of our home and this little gem of a town here in Ohio. If you are planning a trip to Amish country or if you just want a sweet little weekend getaway to slow down and rest, be sure to check into The Urban Flat in Millersburg!

~Happy Reading Friends